Drink photography on-location at restaurants and bars can be quite challenging at times. Doing client work outside the comfort of your controlled studio setting, without all your gear and equipment, can be a little daunting to say the least.
Whether you are shooting food or drinks, you'll have anything from space and lighting problems to that annoying customer with a small bladder walking through your "set" every five minutes! And through it all, you're expected to bring the quality.
Don't get me wrong, photographing drinks in any environment can be a little difficult, so here are 3 simple tips to make POWERFUL drink photography at the bar a WHOLE lot easier.
TIP #1:
Make Use Of Your Ambient Light
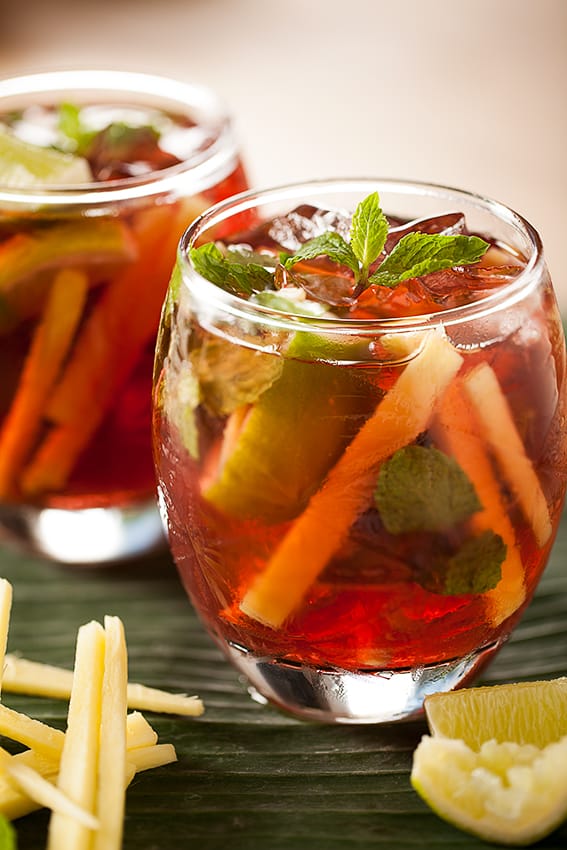
For this ginger, lime and cranberry detox image, I got some help from a large window at the bar. Exposing my camera for the natural window light in the background, allowed me to use my strobes and soft-boxes to further emphasize the direction and quality of light that was already a big part of the bar's environment.
Using the surrounding light minimized the gear needed to create this refreshing drink image.
The ambient light of every restaurant or bar is of course going to be different. It's a good idea to spend the first ten minutes of a shoot, scouting around for some good light. I sometimes will do this on the pre-production day after I've met with the client.
I look at the naturally occurring light (whether it's natural or artificial light) in the space to see if it can be used in any part of the shoot. It could be light from a window or even some hanging at the bar or on the tables. Recruiting some of the light that makes the bar's ambiance will go a long ways in setting the scene for your drink photography.
TIP #2:
TIP #2:
GIVE YOUR DRINK PHOTOGRAPHY SOME DIRECTION
GIVE YOUR DRINK PHOTOGRAPHY SOME DIRECTION
Light direction in your drink photography is really important for creating thirst quenching images. It also speaks to a story outside of the frame. It brings a balance of good highlights and shadows without bad reflections on your drinks.
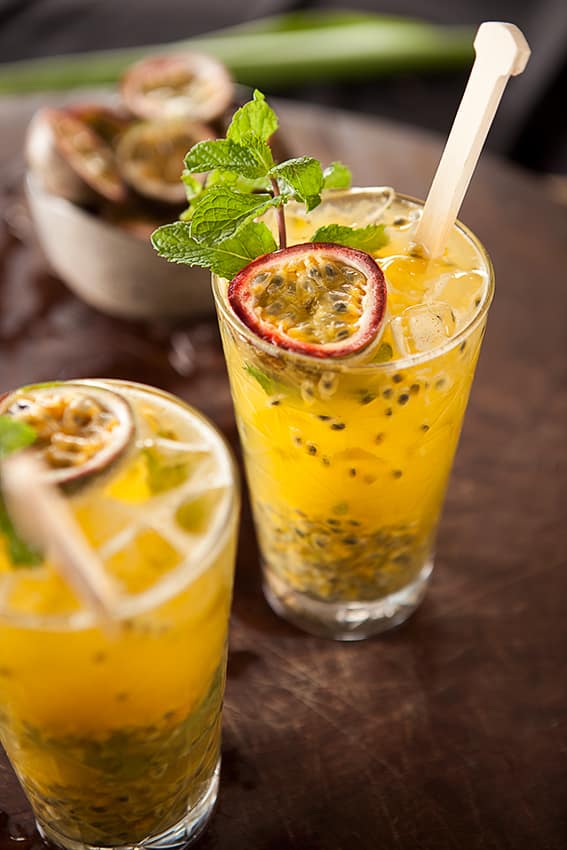
Play around with the positions of your lights as I did here with these passion fruit cocktails to get good highlights on the drink without showing the reflection of my lights in the glasses.
Extra Tip* Try starting your camera level with the drink, then raise it slowly to see how the reflections change on your glass.
New to artificial lights and how to expose for them?
First, try making the distances of each strobe different. This will make one light more powerful than the other, and give you some nice light direction as explained in the diagram below.
This is roughly the lighting diagram I used for the drink photograph above.
The strobe on the left is placed about 1.5ft. from my drinks and is the "key" light giving me some great light direction.
The strobe on the right is placed about 3ft. away and is my "fill" light. Although, it's settings are the same as my "key" light, because it is father away it becomes less powerful. It adds some detail back into the shadow areas, caused by the light on the left, without competing with it for direction.
Beginner Mistake* using two "key" lights causing a double shadow/double highlight in the image. There is only one sun, ya know 😉
TIP #3:
TIP #3:
Use Your Lights To Turn Your Day Into Night
Use Your Lights To Turn Your Day Into Night
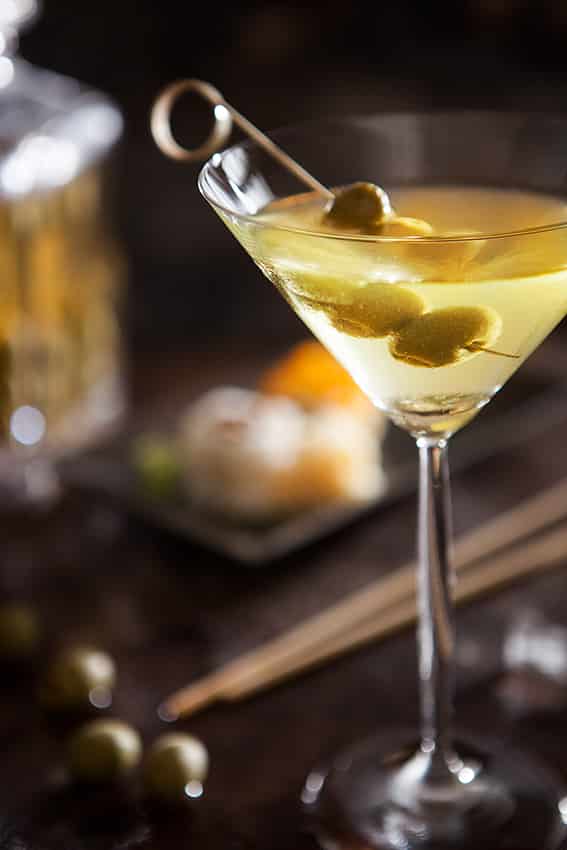
The client wanted this photo of a sake martini to feel like evening, even though the photo shoot was during the day. Thats not a problem if your using studio lights and are good at improvising. I used the same lighting diagram as the above shots, the only difference was that I removed the soft-boxes and placed reflectors and grids on the lights to help narrow it in a little more.
I also placed a dark background in the frame and blocked off the sides of my setup with cards to stop any unwanted natural light from seeping in. Expose for the strobes and WHALAH! it’s the evening.
Extra Tip* When shooting drinks try aiming the light so it shines through the glass illuminating the drink inside. This helps draw the eye straight to the drink in your photograph.
RECAP:
- Use light from your surroundings to include the character of the bar or restaurant into your drink photography.
- Make sure one light source is stronger than all the rest, giving you a light direction that speaks to a world outside the frame.
- Block out ambient light with cards then expose for studio strobes to turn day to night.
Got Any Questions About Drink Photography? Let Me Answer Them In The Comments Below!
This is not a sponsored post, however this post does contain affiliate links to some great photography gear, products or services I currently use or have used in the past. If you plan on shopping for some new great stuff, please click through the link and I'll receive a small commission. Every purchase helps me continue on my never ending quest to provide amazing content.
Check Out Some Of Our Latest Articles, Guides, Tips & Tutorials On We Eat Together!


