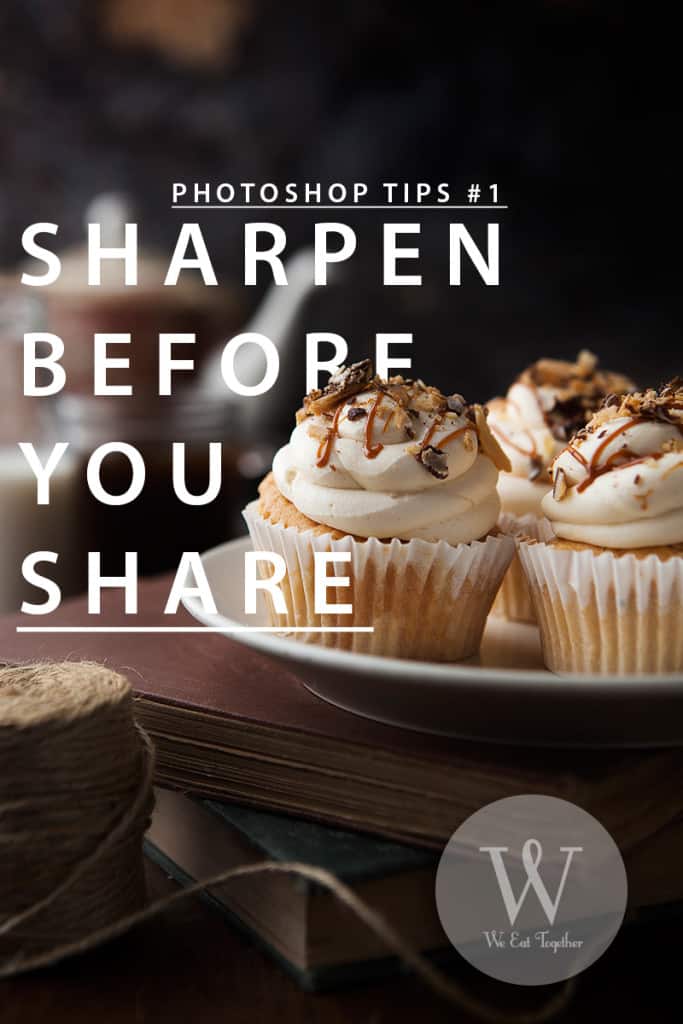
HOW TO KEEP YOUR IMAGES SHARP EVEN ON THE WEB
In case you didn’t know, downsizing kills your image quality. You spent countless hours in the studio and on the computer. Getting the food just right.
Making your realization come to life.
Then comes the time to share your images. You click, “save as,” choose .jpg, upload it to the web and POOF! Your sharpness sucks!
What went wrong? It looked sharp before you saved it, but now that you see it next to other images on the web, you realize that it’s just a bit fuzzy in comparison. I had this problem too. I would even apply extra sharpening to my images in anticipation for this loss of quality caused by downsizing for the web. But it didn’t work. Then I learned this super cool and simple trick.
PHOTOSHOP TIP: SHARPEN BEFORE YOU SHARE
Right now we’re all restricted by putting lower resolution images on the internet. And in making them smaller, you cut the quality down in every way.
If you apply sharpness to a large image, then downsize it, you loose the sharpness right along with all the other pixel crunching you’re doing to fit it on the web.
WATCH HOW TO KEEP YOUR IMAGES SHARP AND THE MOST AWESOME TOOL TO DO IT WITH, IN PHOTOSHOP TIPS VIDEO BELOW…
You can get a lot more tutorials and cool videos on the We Eat Together Youtube Channel!
Here is the step by step screen shots of the process, just in case you missed it.
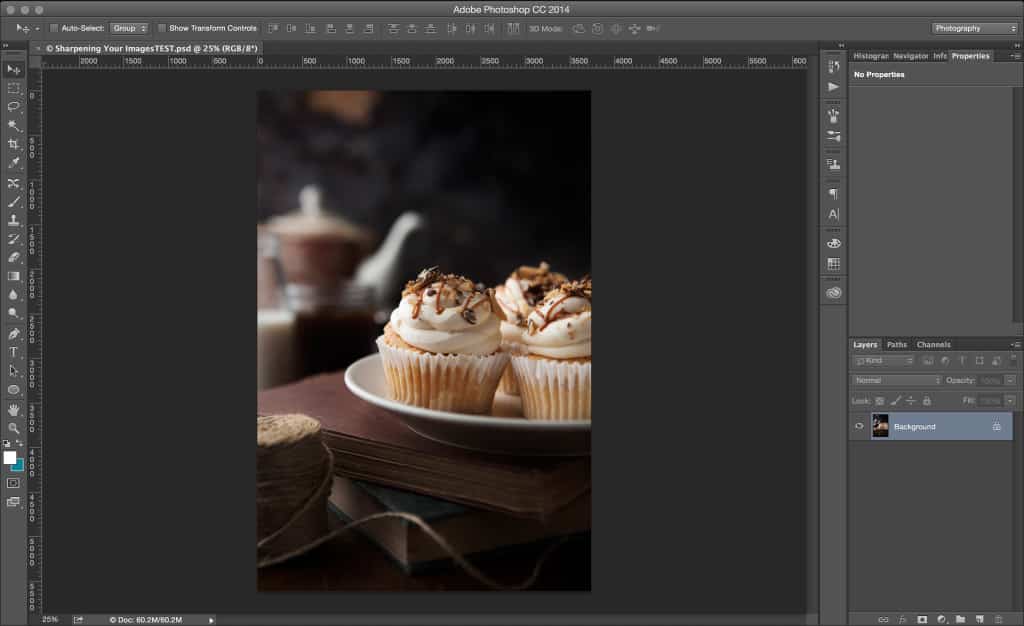
Step 1. Open your image in Photoshop: I have these beautiful butter cream cupcakes to work with, which you can really see the sharpness on the glossy caramel sauce.
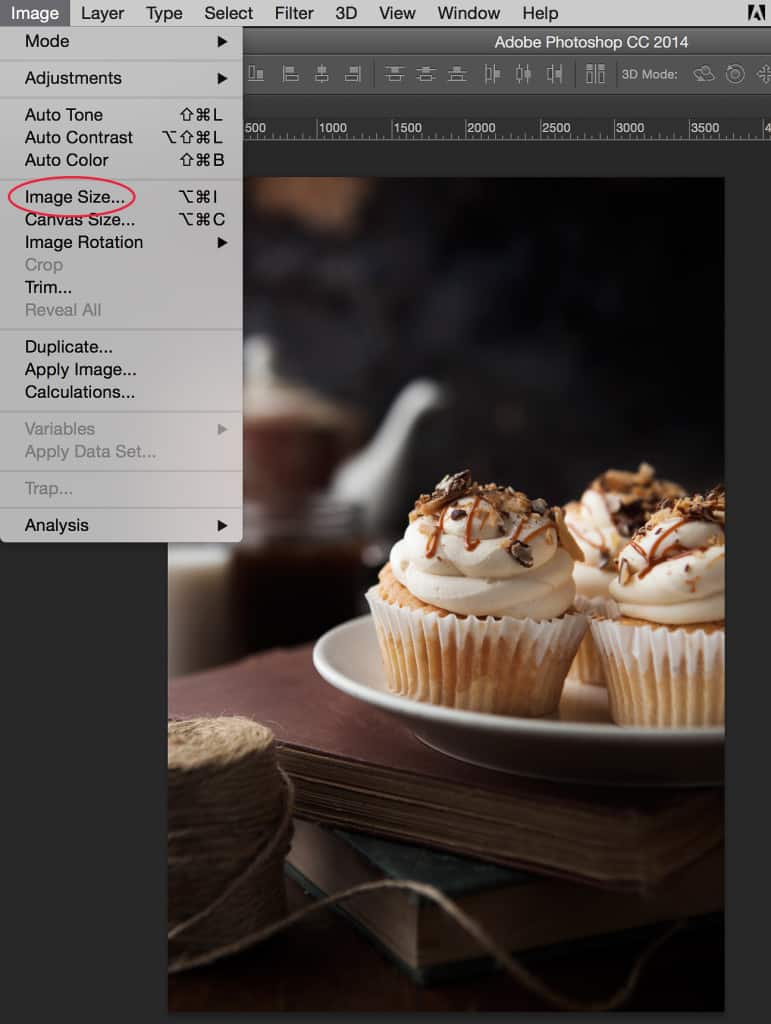
Step 2. Choose the Image Size You Want: Before I apply sharpness to this image I am first going to select the size of the end result. Remember size matters in this case! You need to size your image before you apply the sharpness.
As you saw in the video, this tool can be used before you print, as well, but I’ll be placing this one on the web.
Go to the top bar and click on the Image drop down menu, then scroll down to select Image Size…
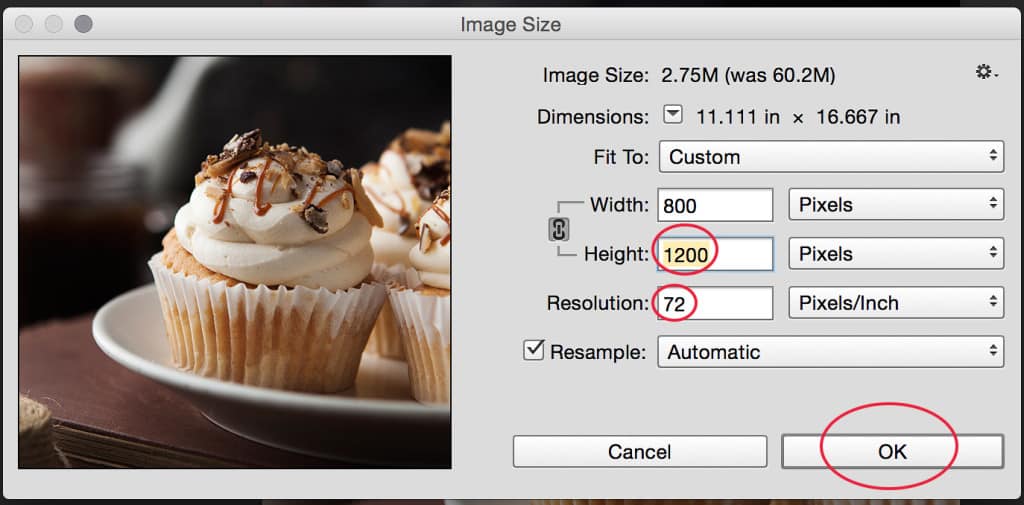
Step 3. Optimize Image Size For The Web: Since this image is going on the internet, I’ll type in my go-to size for the web. First I’ll punch in 72 ppi for the Resolution, then 1200 px for the Height. Once that is done I’ll click OK.
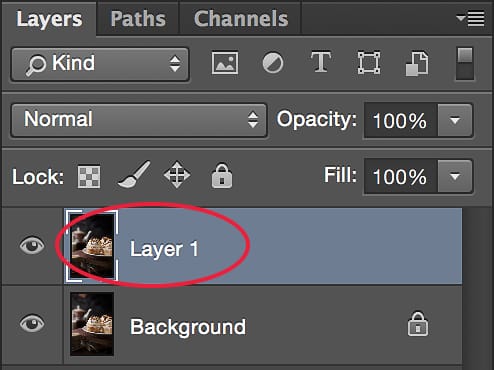
Step 4. Create A New Layer:
Next I’m going to press command+J (or control+J on a PC) and make a layer copy to place the sharpening on.
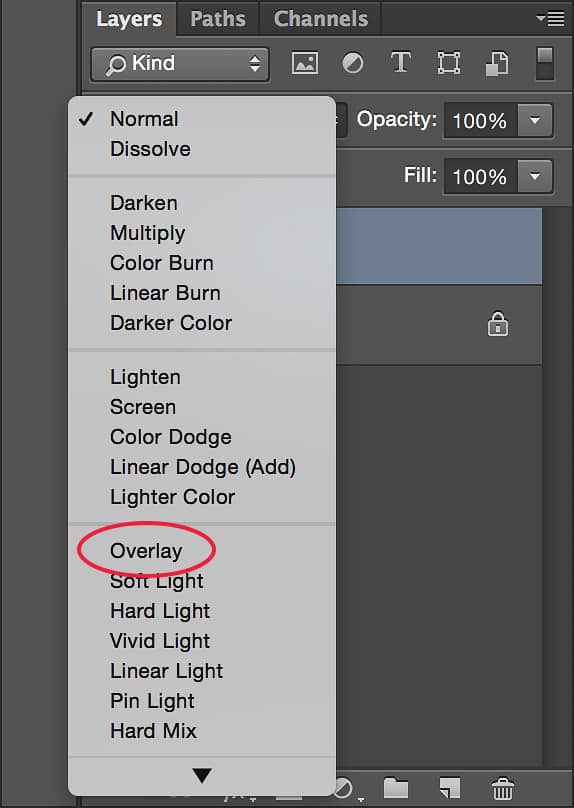
Step 5. Change The Blending Mode:
I’m going to choose the Overlay blending mode for this new layer. It’s going to make my image look a little funky, but no worries because in the next step it will go back to normal.
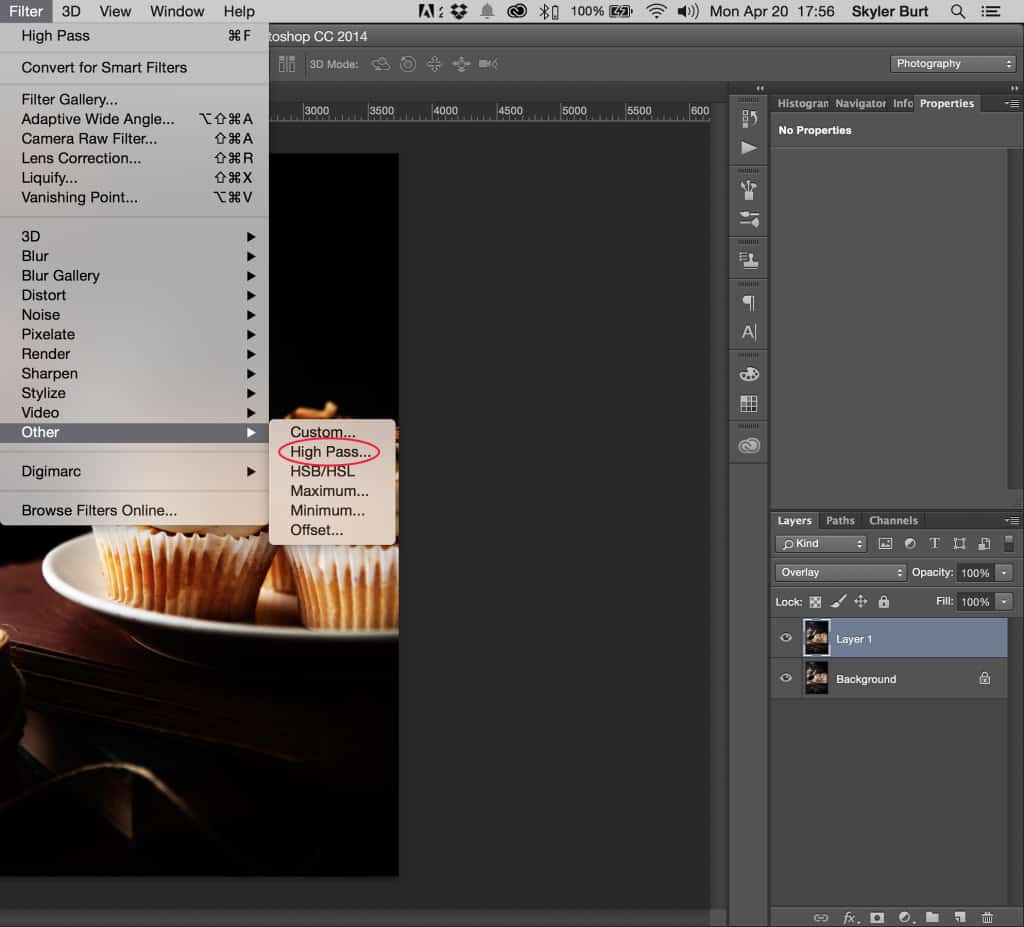
Step 6. Apply The High Pass Filter: This next step is where the super cool Photoshop filter makes it’s entrance. Select Other > High Pass… in the Filter drop down menu.
Step 7. Best Used In Small Doses: The High Pass dialog box will appear and your image will return back to normal. In the High Pass box you can see the Radius slider at the bottom.
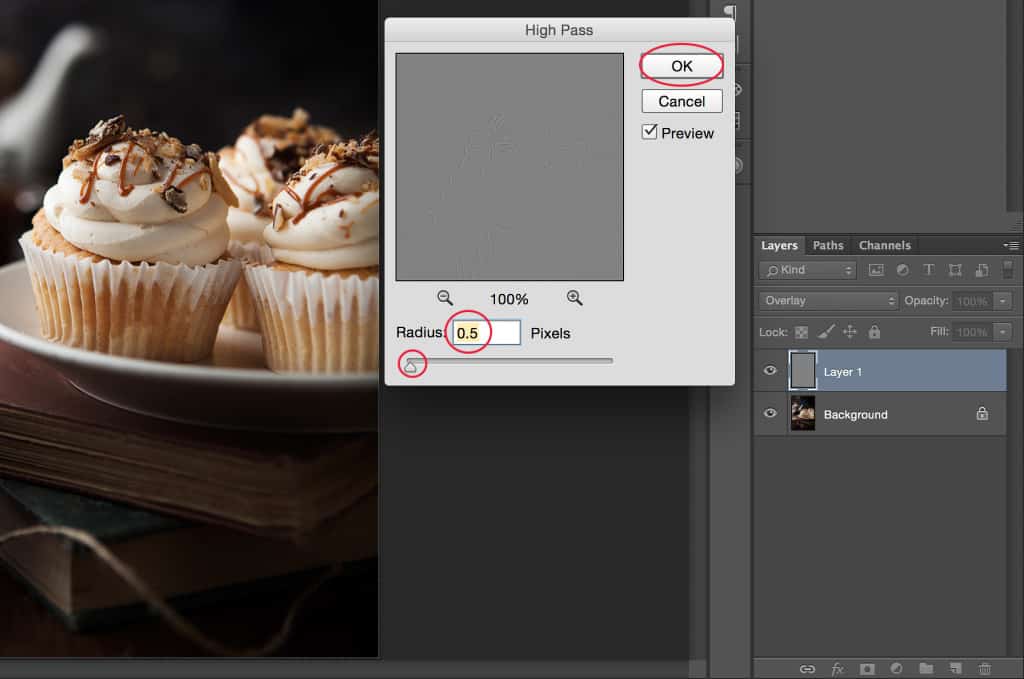
As you move this slider to the right, the greyed out box starts to show an outline of your image. Like I said in the video, at around 5000px wide for print, I like to use a Radius near 1.4. Since this image is about 1200px wide for the web, I’m going to select a Radius of 0.5. Not a lot, I know, but the High Pass Filter is best in small doses.
Step 8. One Last Trick: That’s really all there is too sharpening your images for sharing on the web. One last step to fully optimize your images and get them looking their best is to click on the File drop down menu and select Save for Web…
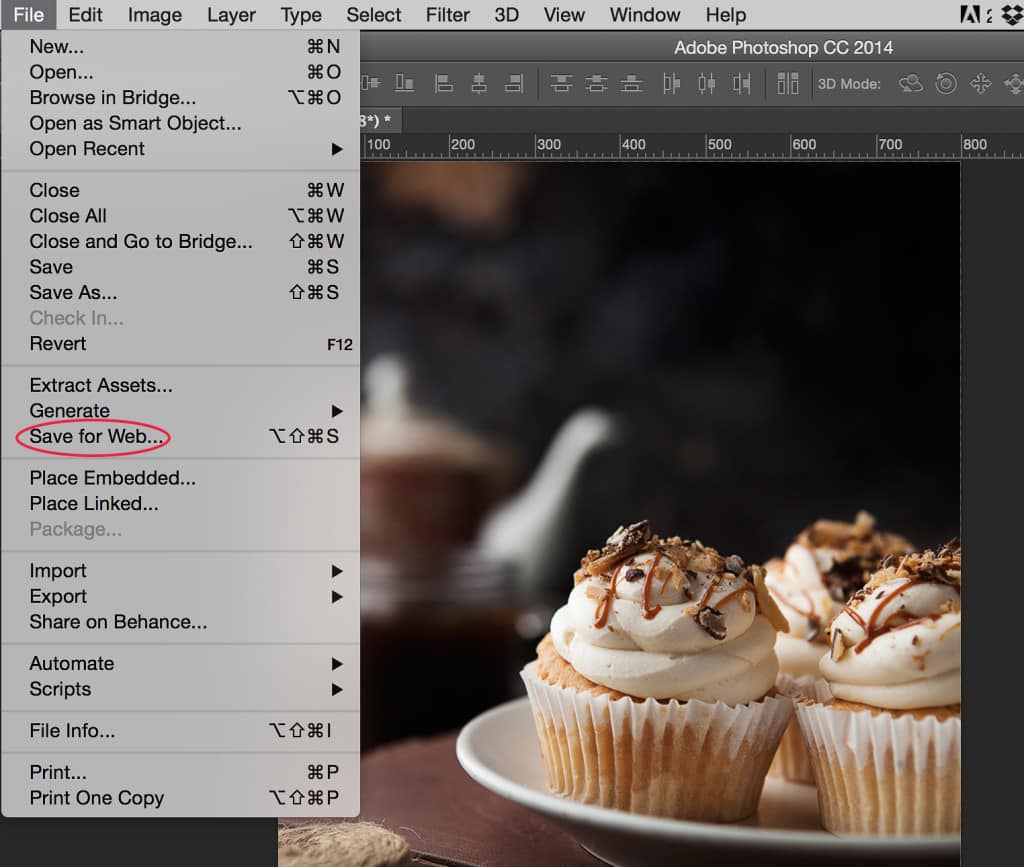
This will automatically flatten your layers and convert your image to sRGB. (sRGB is a color space used by the web and will ensure your colors will display nicely)
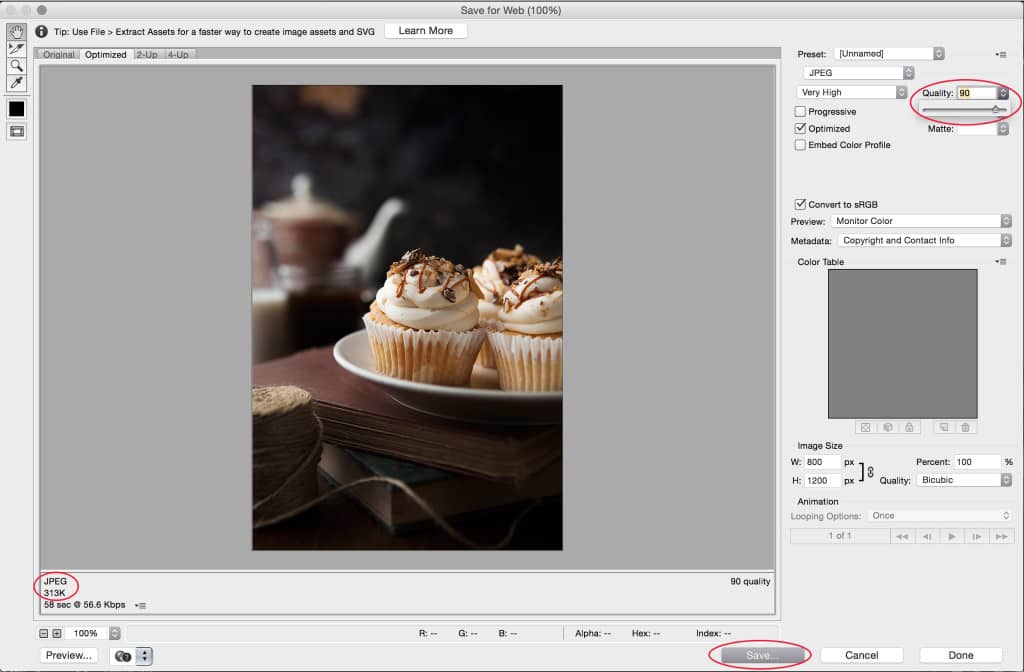
Next you can make sure that the JPEG file type is selected and move the Quality slider if you’d like. I like to keep my images under 500k so they upload and download fast. The Save for Web… function is great because as you move the quality slider you can see exactly how big your file will be in the lower left hand corner.
Once your finished, press save and share with your audience.
You can see the difference in the two images below. One has the High Pass filter applied and the the other is regular. Hover over them to see which is which. (If you can’t already tell)