Food photography lighting, is my passion. So much of my Food Photography Masterclass is dedicated to lighting.
Of course when I set up all my gear and food photography backdrops the sun doesn't want to come out to play. Nope the sky above just wants to pour rain and gloom down on to my dreams of photography bliss.
I'm sure that a lot of you have the same problem I do. I love natural light food photography, but the sun is not always available at my beck and call.
Here are some great food photography tips that will help you overcome your natural light woes. However, let me show you how to fool people with your artificial lights.
I'm sure most photographers, who MUST use artificial lighting for whatever reason, have the same problems I do. There are qualities to natural food photography lighting that are difficult to explain, though when we see the two side by side, for some reason we can just tell the two apart.
If you want to see a cool comparison, I just shot this iPhone food photography video where I used my smartphone with both natural and artificial lights.
Artificial Or Natual Lighting, Which is Which?
(mouse over the images to see which was shot with strobes and which was shot using natural light)
Here is the food photography lighting setup I use all the time when photographing with natural light. It's a rather simple lighting setup.
- Large window
- 3 stop diffusor (from a 5-in-1 reflector kit)
- black or white card on the opposite side of the table
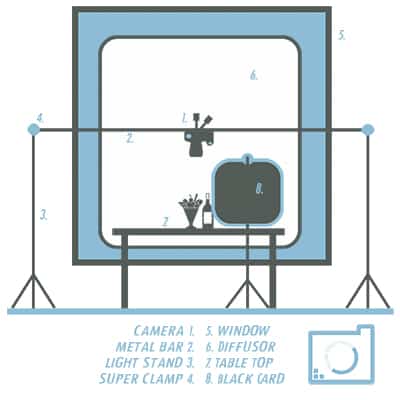
Beauty is born out of its simplicity, the hard light of the sun striking the large diffusor placed really close to the food, works to create beautiful soft light for food photography.
The simplicity of the natural light food photography setup is something I try to keep in mind when using artificial lighting.
4 Easy Steps For The Best food photography lighting
- Avoid flat lighting with a setup that creates soft highlights and shadows
- Choose light modifiers that help you achieve that natural light look
- Adjust the distance of the lights and modifiers to give you beautiful light gradations.
- Use flags to block off parts of your food photography lighting to create that dark and moody feel to your images
Through some experiments of my own, I have found a few obstacles food photographers tend to face when trying to make their artificial food photography lighting look natural.
1. FIGHT FLAT LIGHTING
Probably the most important obstacle to overcome and one that kills so many potentially great food photos is "flat" lighting. You need those dramatic highlights and shadows in your food photography lighting to make your food pop!
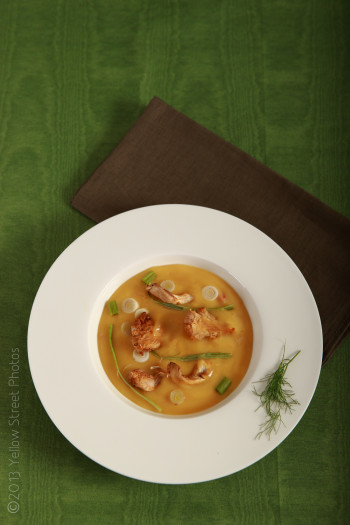
FLAT! FLAT! FLAT! No highlights, no shadows, low contrast and pretty much sucks all around!
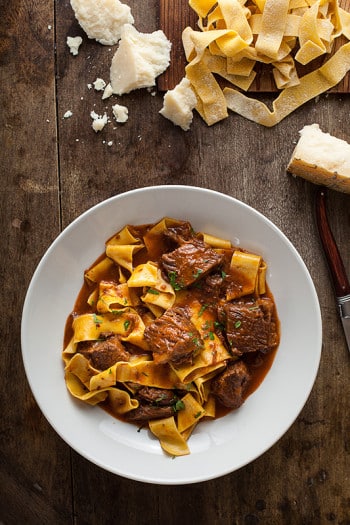
Now this has light! You can see it represented by actual highlights and shadows. You get a defined direction. All around much better.
Photos without clear highlights and shadow areas, are a dead give away that artificial lights were at use. Oftentimes, artificial light travels right past your subject, a lot further than you might think, even at its lowest setting.
Why is this a problem?
Well, the artificial light will bounce around your studio and reflect back into the shadow areas, so much so, that the image could become "flat".
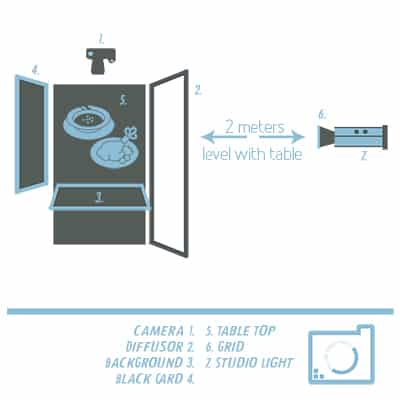
To fight off the flat-light demons, the food photography lighting equipment and setup is very similar to how you would photograph food with natural light.
- Studio Strobe Or Constant Light
- Dish Reflector / Grid
- Diffusor
- Black Card
I created an entire lesson on artificial food photography lighting that looks natural in my Food Photography Masterclass, and with very little gear you can get amazing results.
2. CHOOSING THE perfect LIGHT MODIFIERS FOR YOUR ARTIFICIAL FOOD PHOTOGRAPHY LIGHTING
I personally prefer the look of the reflector/grid combo when trying to mimic natural food photography lighting. Although, by no means an exact match right out of the box, it offers a starting point of crisp long highlights that smoothly transition into soft shadow areas.
Large Soft Box
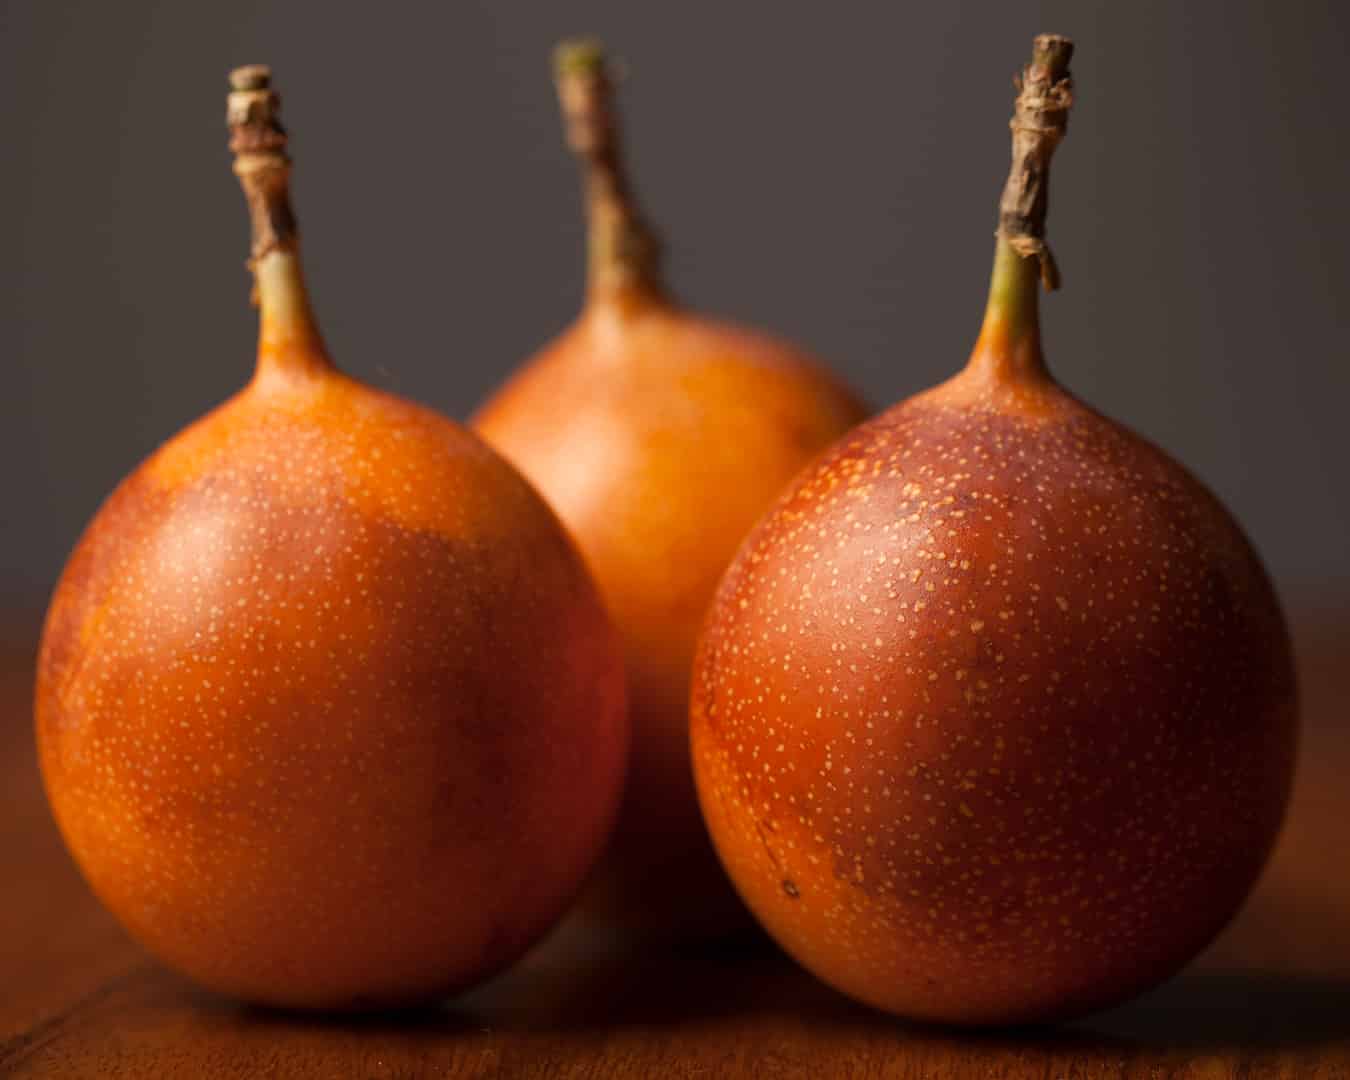
Direct Diffused Natural Light
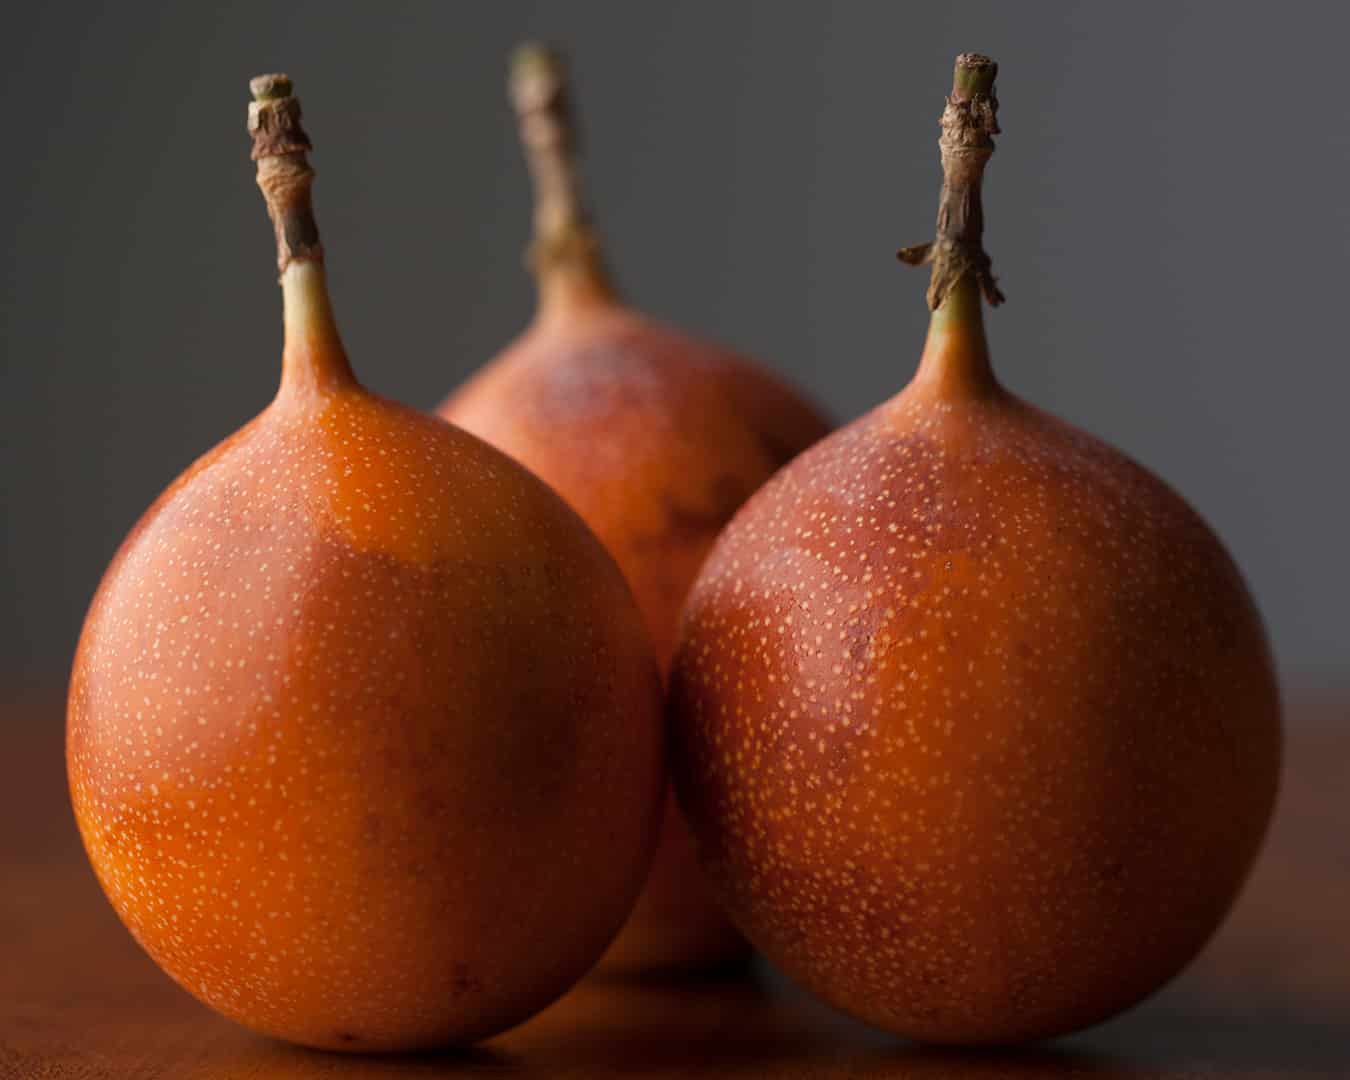
Reflector/Grid/Diffusor
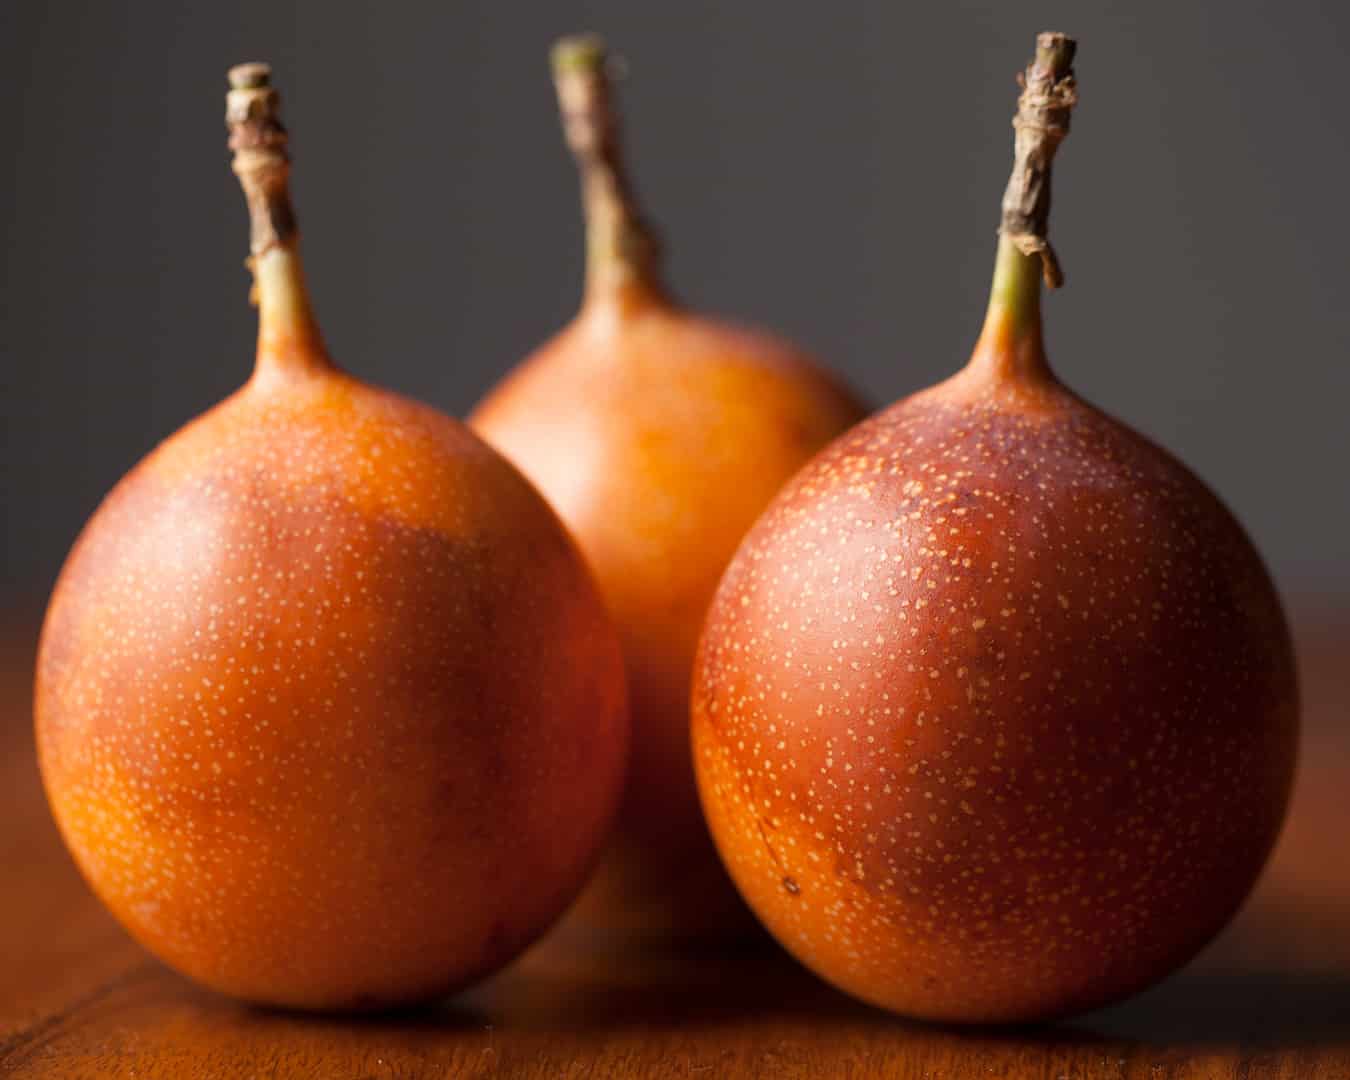
GRID AND REFLECTOR COMBO:
Grids work to focus your artificial light into a circular beam with fuzzy edges. Most brands sell grids and reflectors in a kit, but you can also find them sold separately.
Measured in degrees they differ in the size of the honeycomb pattern. Ranging from around 10-60 degrees, (this Ultrapure Kit come in 8,12,20,30 degrees), the lower the degree, the more focused the beam will be. I prefer to use 20-30 degree grids for shaping my food photography lighting.
Large Diffusor:
Probably my favorite piece of equipment, the large diffusor that comes as a part of the 5-in-1 kit is a photographer's best friend. Great in so many situations where soft diffused light is needed, the diffusor is paramount to modifying natural and artificial food photography lighting.
I throw the rest of this kit in the bag, the diffusor with its solid yet flexible ring is worth the cheap price tag by itself. Knocking down the light by about 3 stops it's perfect for using large apertures with both artificial lights and hard direct sun rays.
These two light modifiers replicate what occurs already with diffused natural light. The reflector and grid combo is like the sun, creating a small narrow beam of light, which hits the large diffusor. The large diffusor in turn becomes the new light source. Both working together to give you some amazing food photography lighting for your images!
If you want to see another great light modifying combo, check out this article on pro beverage photography lighting made simple.
3. Adjust the Distances of the light ramp up the drama
Changing the distances of either the modifier or the light will have dramatic differences when it comes to mimicking that moody natural light look in your food photography lighting.
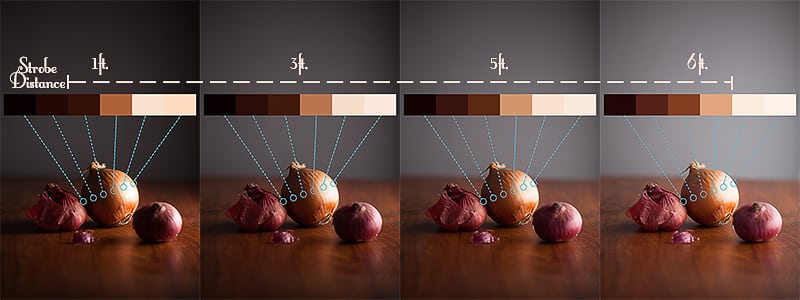
Oftentimes with artificial light, hard transitions occur between the highlights and shadows, even when diffusing the light. In this set of images, the large diffusor is placed flush with the table. As I move the studio strobe back in increments you can see the effect it has on red onions.
Adjusting The Distance Of The Light
When I first started to try and make my artificial light look natural, it was the gradient between the highlights and shadows that gave it away. Everything would look great except, "HOW" the light spread, as if my highlights abruptly fell off a cliff into shadows.
Also as you move the light closer, you'll notice the brightness of the background getting darker (this is called the inverse square law). You will need to compensate for this by adjusting your aperture, ISO or the power of the light. The farther you move the light back the more light will spread and that transition will keep getting smoother. I find a healthy balance and natural look with my artificial light at about 5ft.
Adjusting The Distance Of The Diffusor
How far away you place your diffusor from the table will also greatly affect the quality of your food photography lighting. Once the artificial light strikes your diffusor, the diffusor becomes the new light source and as the story goes, a large light close up gives soft light where a small light far away gives hard light.
Below are some sample images I made, each moving the diffusor farther away from my subject.
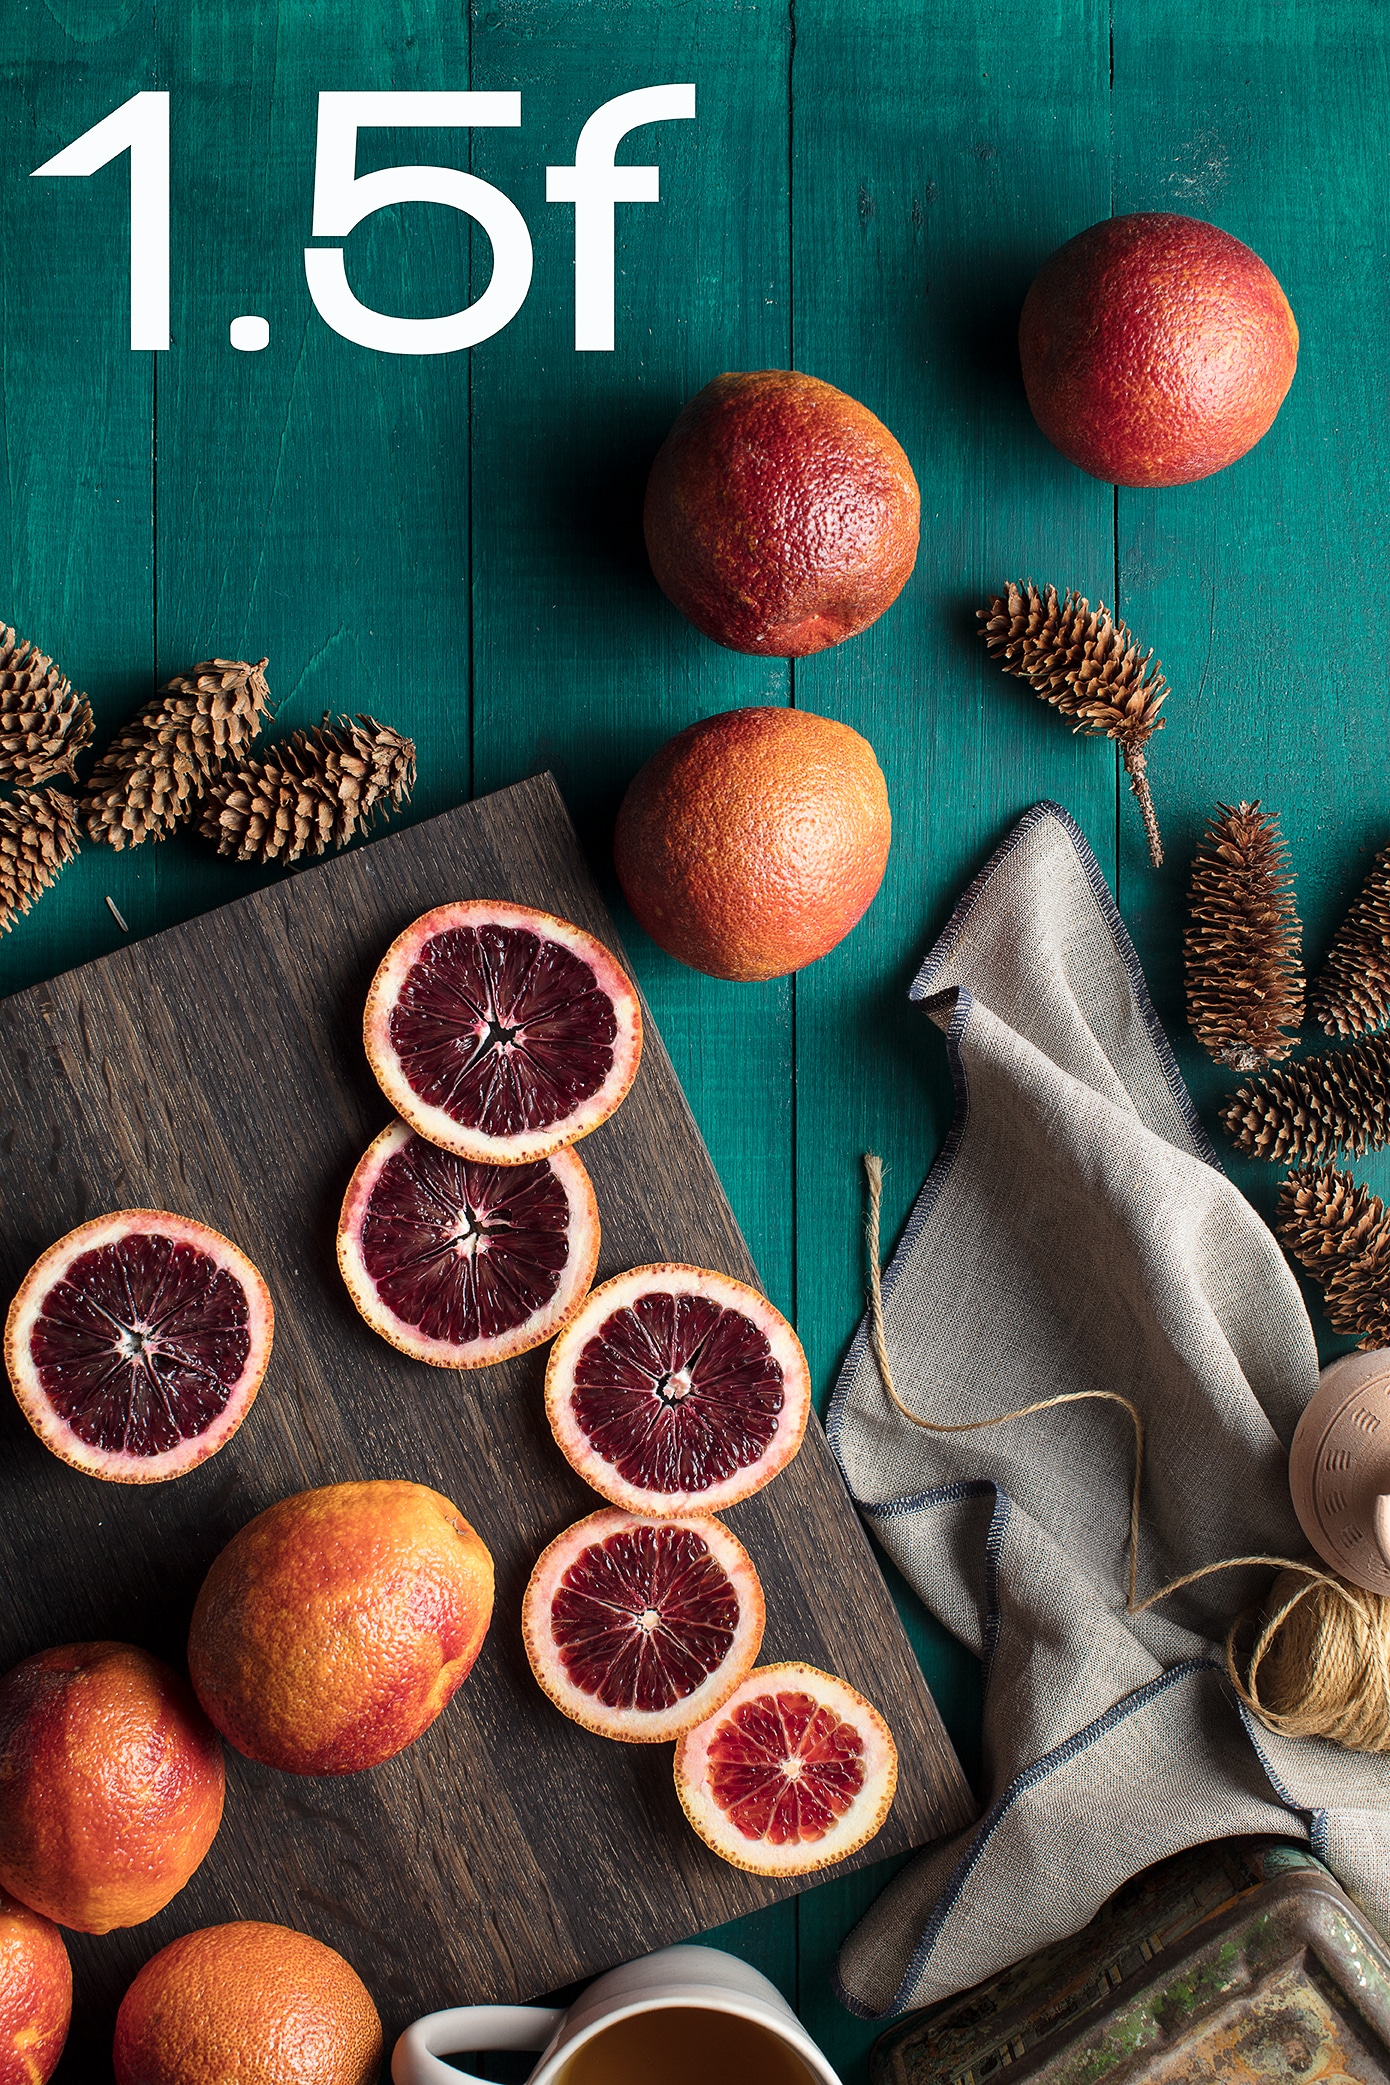
At 1.5 feet away you can see that the highlight is larger and the shadows are shorter, but both the highlights and shadows are soft.
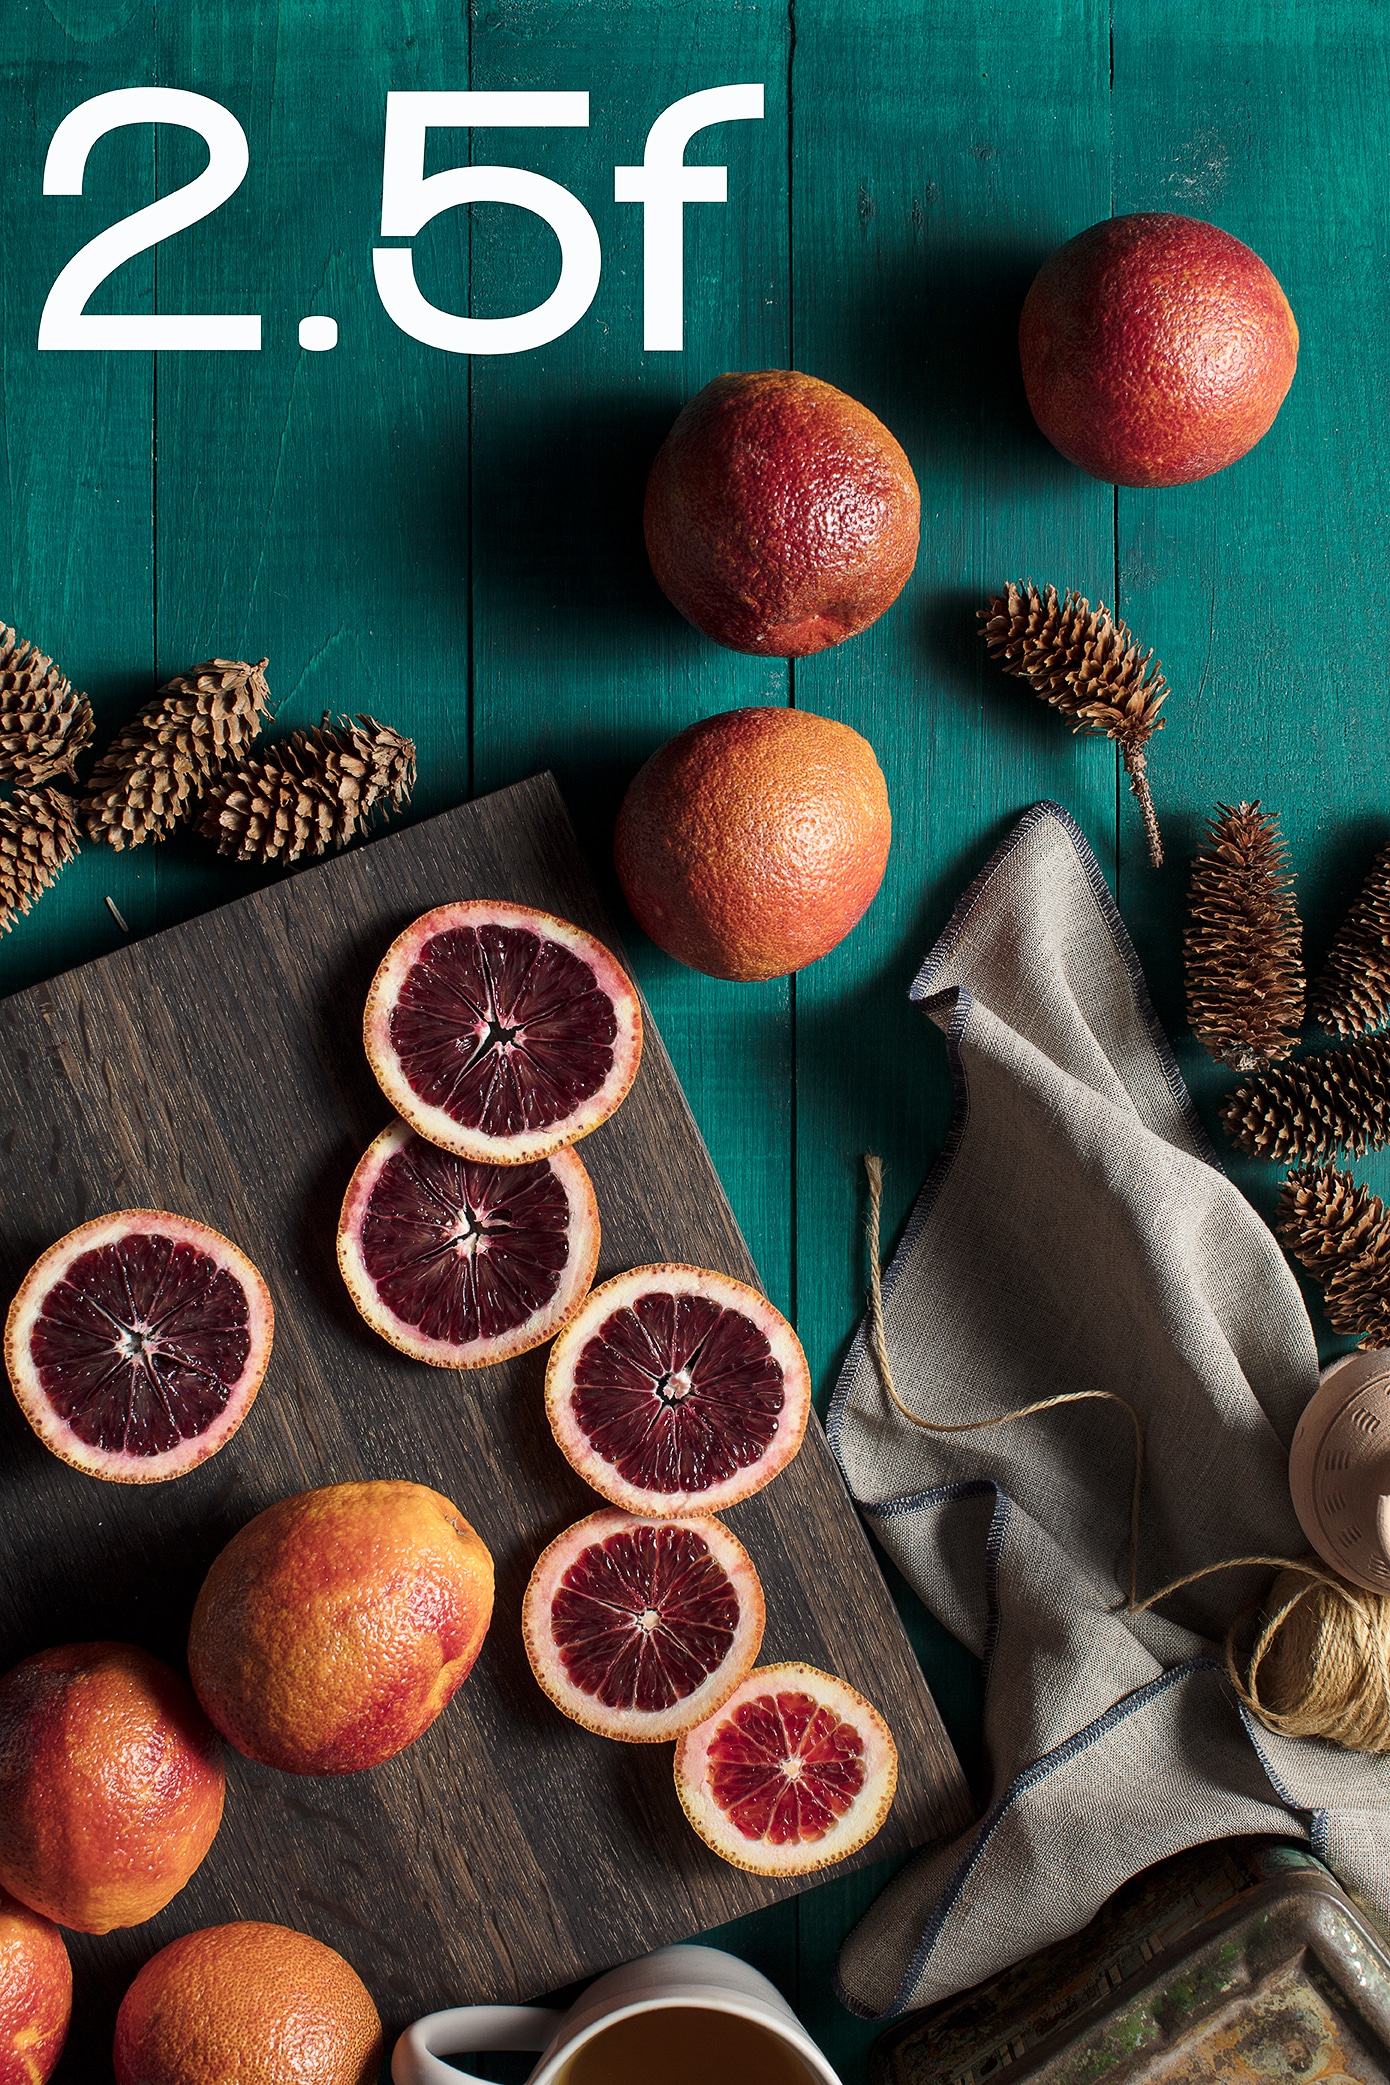
Move the diffusor to 2.5 feet away and those highlights become slightly smaller and the shadows stretch out farther on the table. I would love this for an early morning scene.
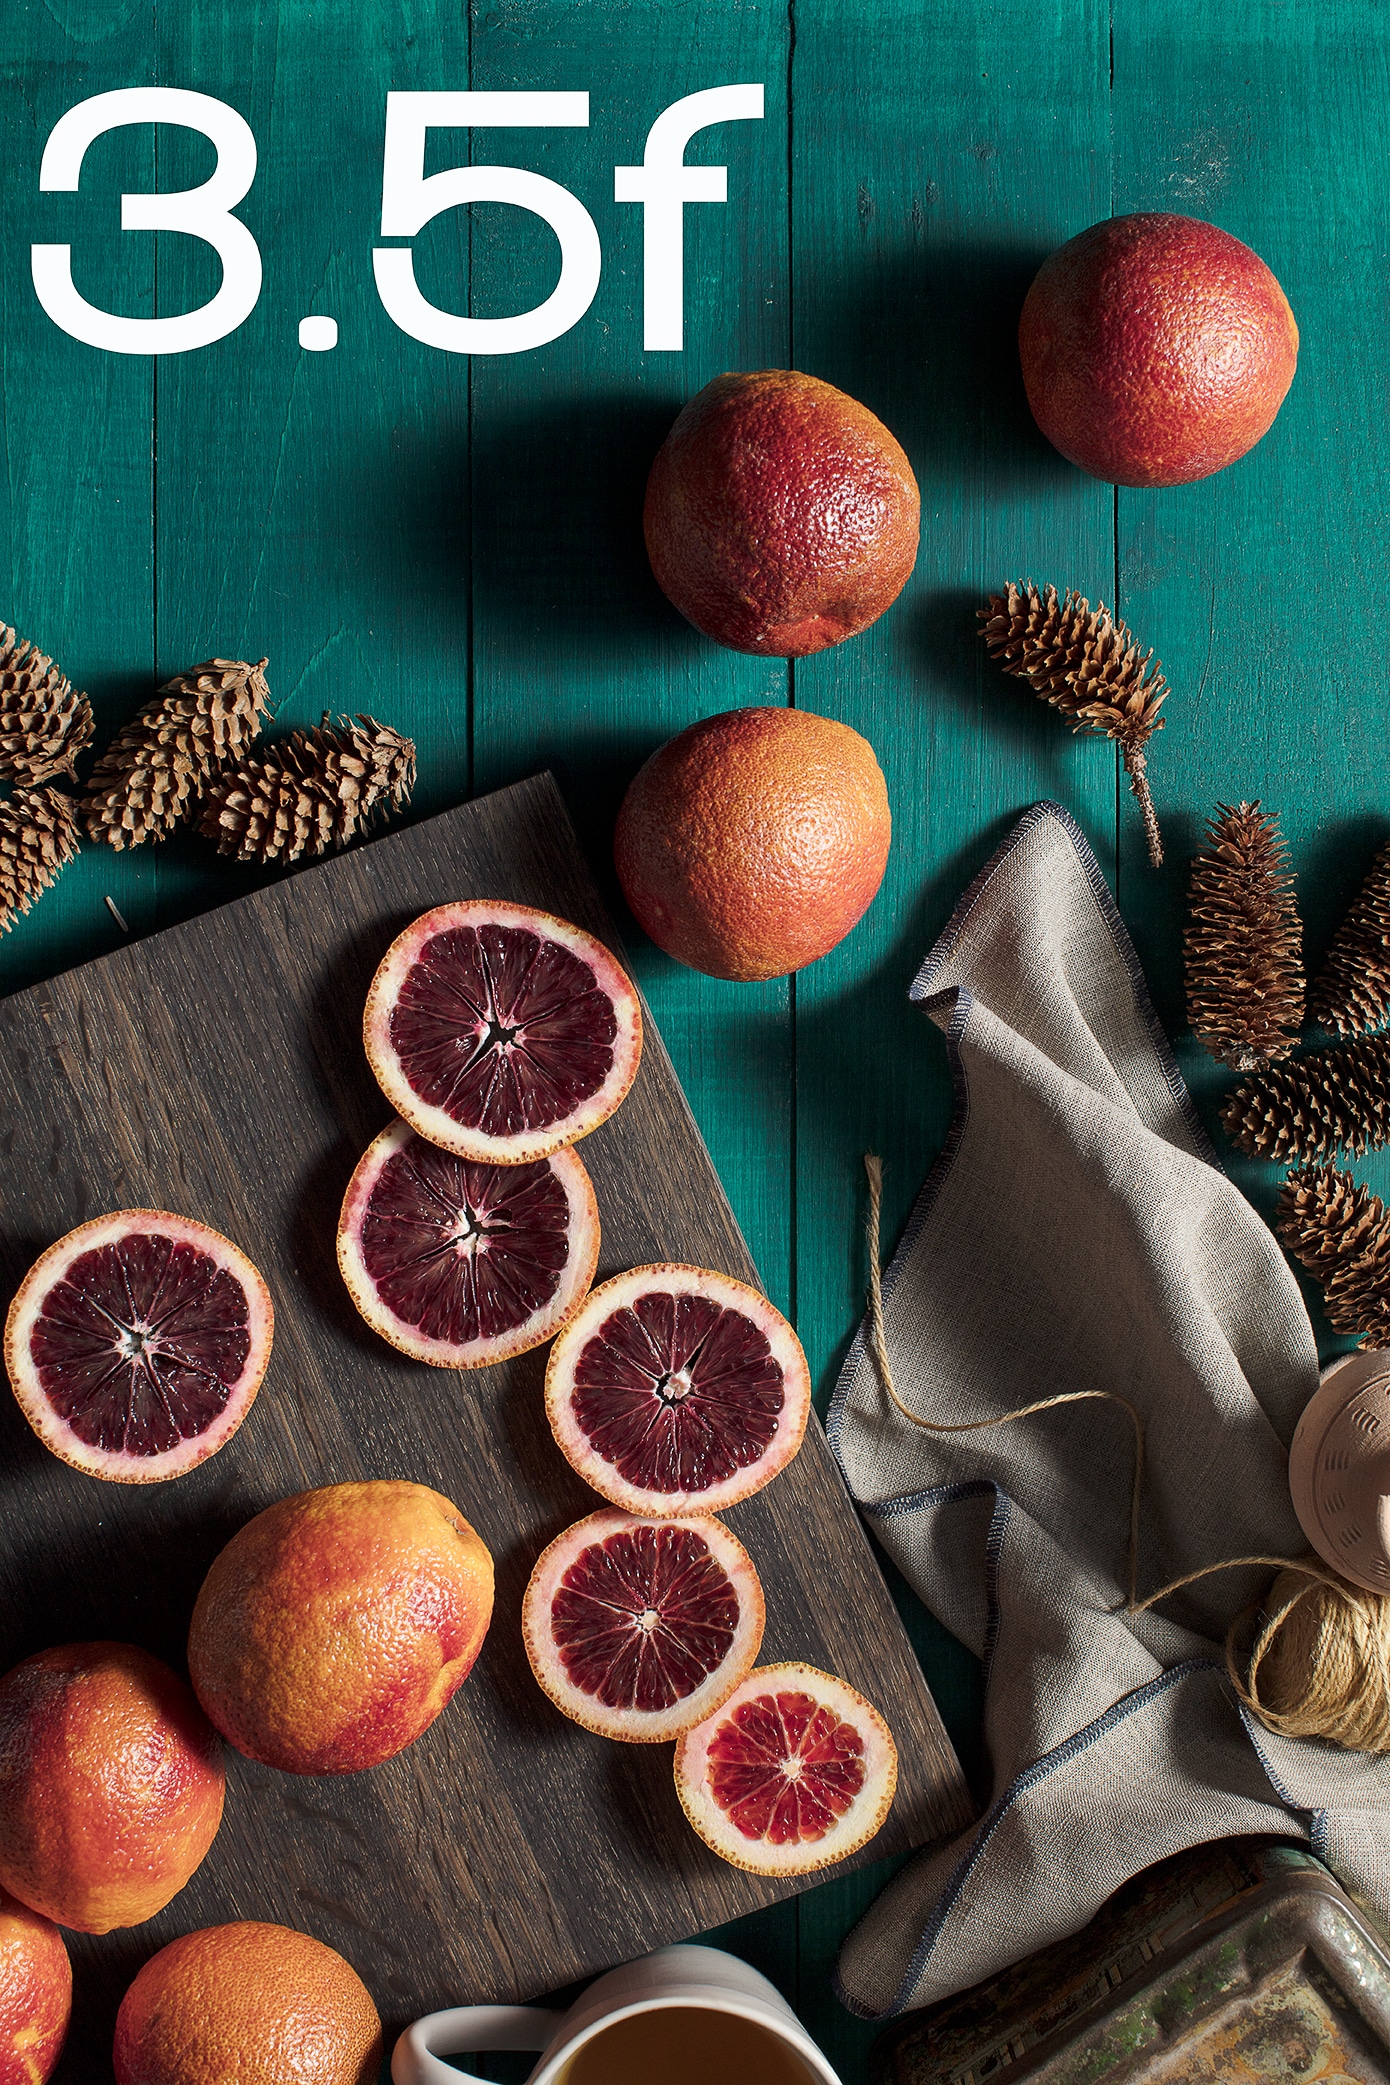
From 2.5 feet and beyond the shadows become too long and defined. The light becomes too hard and distracting for the type of stories I generally tell. However this might work great if the shadows are part of the story in an abstract image.
Personally, I find myself placing the diffuser at about 1.5 feet away from my subject. For most of the stories I am telling, I place the diffusor flush with my table and the artificial light (modified with a reflector/grid combo) about 5 feet away. I love how the large highlights fall smoothly into shadow. However the highlights and shadows are both strong enough to mimic that beautiful moody natural food photography lighting.
(mouse over the images to see which was shot with strobes and which was shot using natural light)
4. Use flags to create that dark and moody food photography lighting
Food photography lighting is a matter of building up the mood in layers. The reflector/grid combo does a really great job narrowing that beam of light, but to construct an even more dramatic scene, try clamping on black cards or Flags to your diffusor.
A few flags for your light can add another element to your story, like a sun ray coming through a window. Grab a few rectangle black cards or some dark fabric, then place your main subject where the light strikes the table and let the rest of your props fall off to shadow. Have a look at the images below.
1st Flag clamped to the diffusor to shade the lower half of the frame. Drives viewers eyes up through the story.

2nd Flag clamped to the diffusor shades the upper half of the frame. Gives the illusion of a ray of light, framing the subject with shadows.

At this point, you can get really creative with your food photography lighting. You can keep the setup simple or build on to it, but with these 4 easy tips your artificial lighting will look closer to that beautiful natural light food photography we all love.
Looking for some more natural and artificial food photography lighting tips?
This is not a sponsored post, however this post does contain affiliate links to some great photography gear, products or services I currently use or have used in the past. If you plan on shopping for some new great stuff, please click through the link and I'll receive a small commission. Every purchase helps me continue on my never ending quest to provide amazing content.
Check Out Some Of Our Latest Articles, Guides, Tips & Tutorials On We Eat Together!

