Funny how things work out, because not only does this Gemelli recipe appear in the natural light section of my Food Photography Masterclass, while photographing this recipe again, I touched on a completely different photoshop lesson from the course at the same time. Something that pops up in my day-to-day life all the time; a simple, but extremely powerful tool for beginning food photographers. Actually, it's more of a mindset than a tool; an approach to food photography (really any type of photography) that is better learned sooner than later. That lesson is to Shoot FOR Post-Production, rather than the other way around. To make Lightroom or Photoshop part of the creative process from the beginning as opposed to merely corrective tools at the end.
For this spicy lemon and mint gemelli shoot, I knew I wanted the gemelli perfectly styled on the plate, but I was torn between having an empty part of the pan from where I took the pasta or to having a full pan of styled pasta as well.
Once you take that spoonful from the pan there is no going back and since I couldn't really make up my mind without seeing both scenarios side-by-side at the end, I decided to cover my ass from the beginning.
When my vision for the final image isn't clear right off the bat, or I run into a case where I don't have enough food or props to complete my final photograph, here is how I approach the shoot in four simple steps.
4 Simple Photoshop Steps To Composite Food Photography
Step 1: Compose For Photoshop
Now I'm going to be making a composition, where both a full pan of pasta and a perfectly styled plate of pasta appear in the same final image once put together inside of Photoshop.
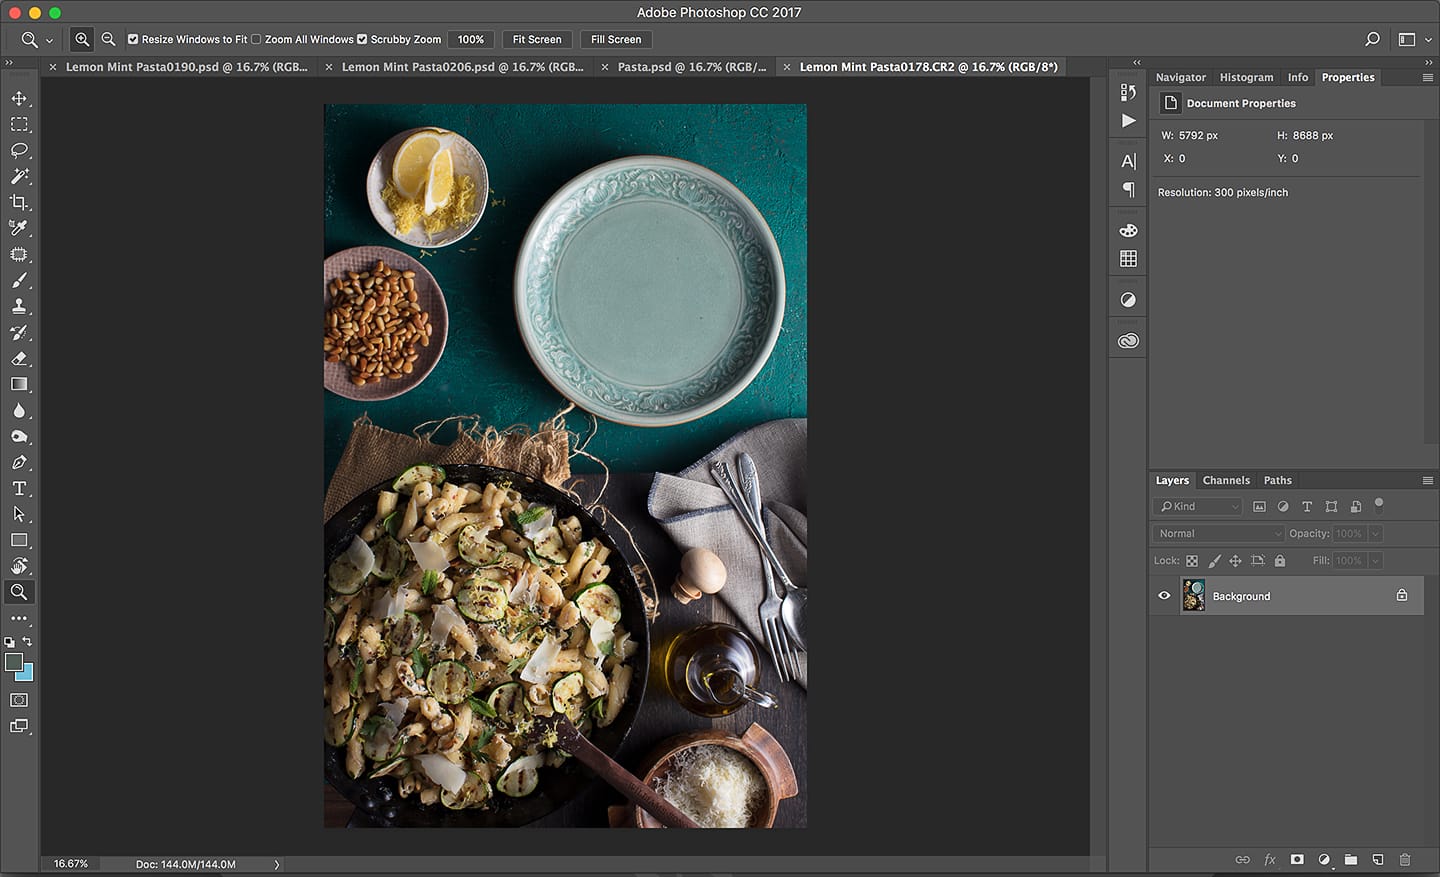
First make your final composition and take an image without the hero subject, like in the screen grab from Photoshop below. You can see that I have the full pan of gemelli, my side props and the position of where my hero subject will be in the end composition. Nothing about the overall placement of the elements in my composition or camera settings will change from this arrangement.
Step 2: Place the Hero
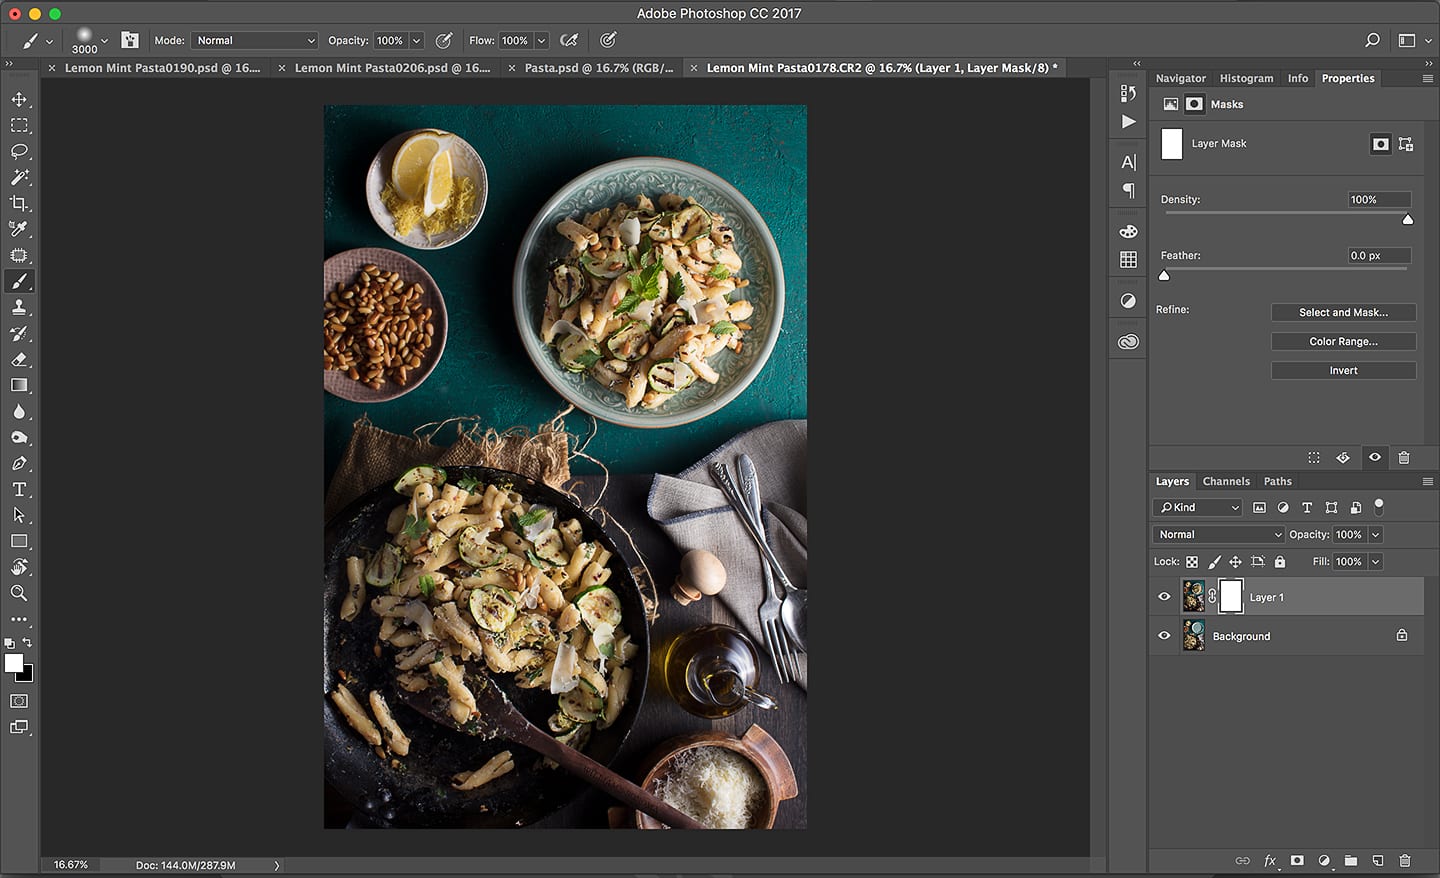
Without changing anything, move only the hero into place and take another shot. In the case of this image, it was scooping the gemelli from the pan onto the plate. I then styled the gemelli on the plate and re-styled the pan. (*Styling the pan again isn't necessary, but because I want to compare the image we're creating in Photoshop, with this photograph of the scoop taken out of the pan and placed on the plate, I want to make sure that this image is perfect as well)
Once you make this photograph, that is it and the photography is done! Take your two badass images over to Photoshop to start the merging process. Firstly, make sure that any RAW color correct done to one is also done to the other image, then using the MOVE TOOL, click and drag one image on top of the other. (Holding Shift while releasing the mouse will perfectly center the image on to the other) Now you will have a document with both images, each on their own layer.
With the top layer selected, click on the ADD A MASK icon on the bottom tool bar located on the right.
Step 3: Blending the Two Images
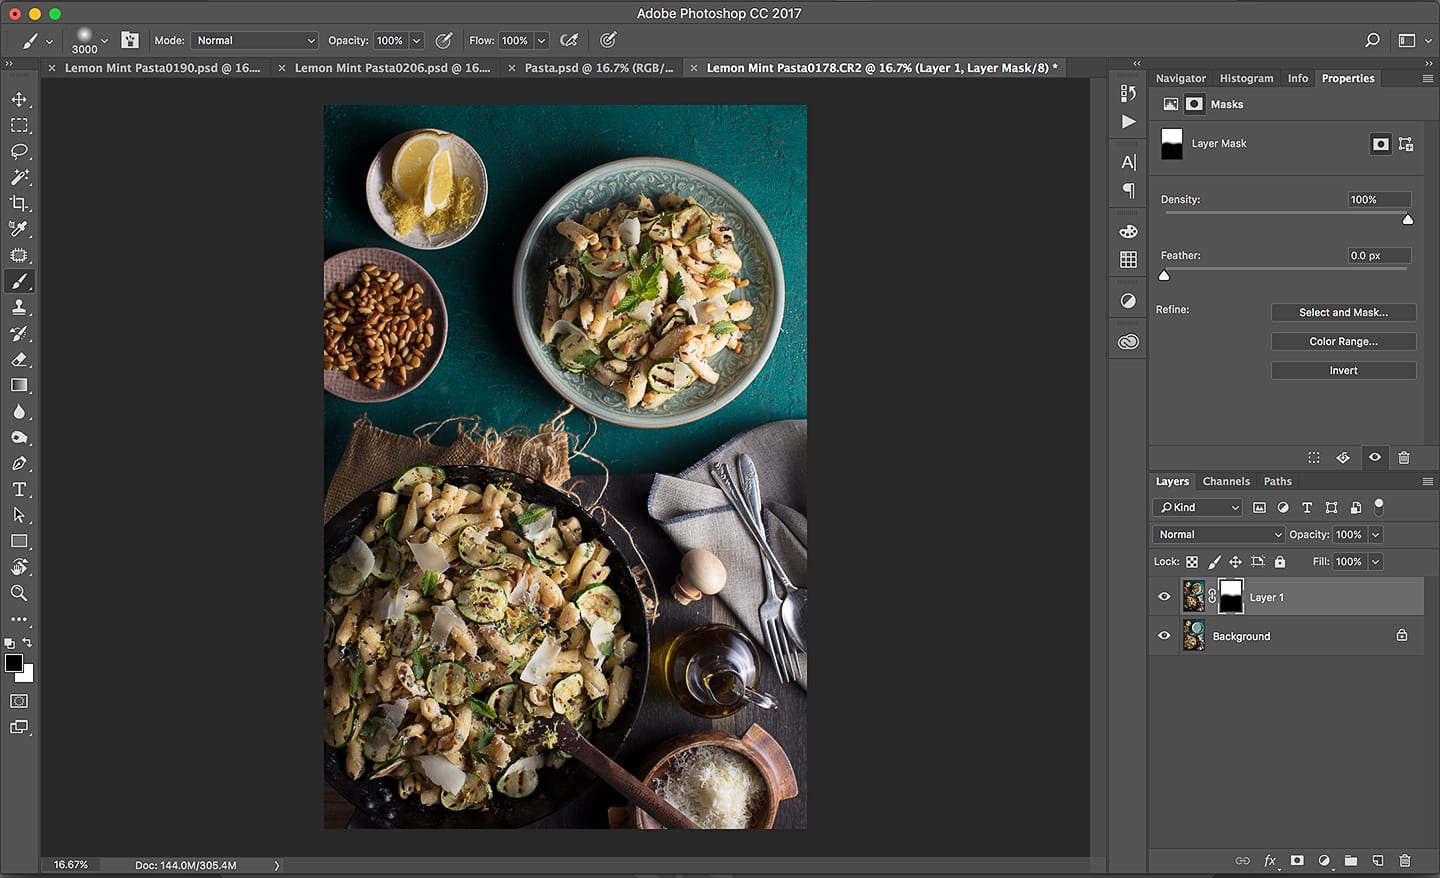
With the MASK selected click on the BRUSH tool located on the left-hand tool bar or hit "B" on your keyboard. You are going to want to select a medium sized soft brush. (To change the size of your brush tool you can use the left [ key and right ] key and to change the softness of the brush you can press shift + [ or shift + ] on your keyboard)
Using black paint, brush over the area you want to make appear through the mask. In this case it was my pan full of pasta. You will see the mask icon on the layer start to turn black where you paint and the image from the bottom layer will show through.
Step 4: Finished!
If everything worked right, you should have a new image with both of the key elements, props or food combined into a single image inside of Photoshop.
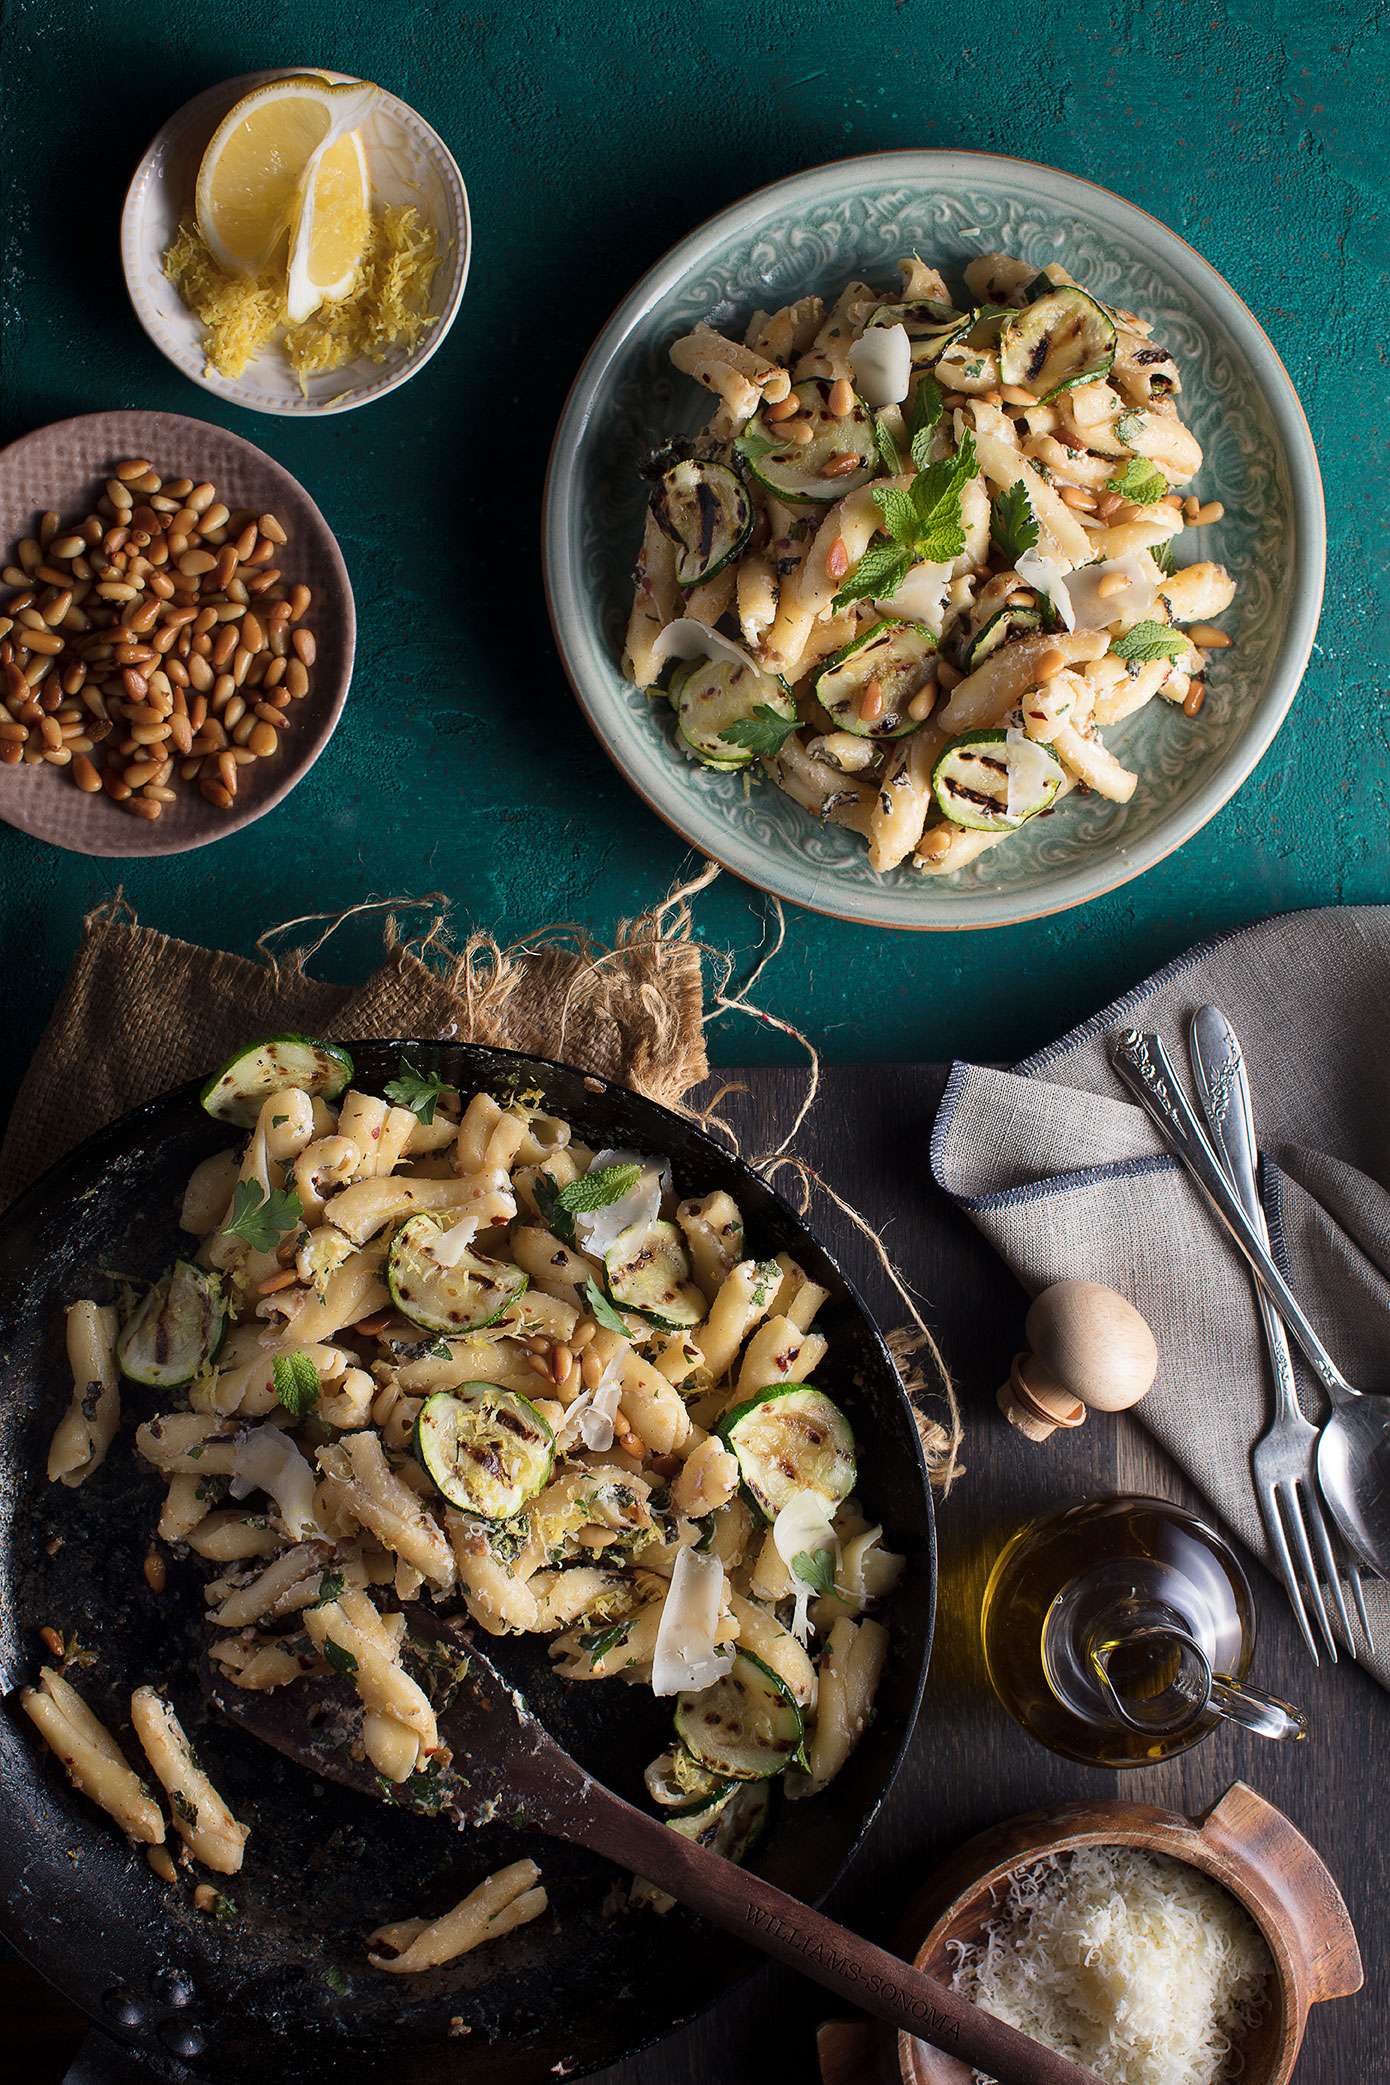
As you see below, I now can compare both ideas I had for this pasta image. One with both the pan and the plate bursting with the spicy lemon and mint gemelli and one image with a portion of the pan empty reveling where the gemelli on the plate came from.
After all of the Photoshop, I personally prefer the image with the scoop missing from the pan. To me it seems more natural and human, but nevertheless I'm glad I have options, which is what shooting FOR post-production is all about. Later on down the road you never know what client may want or what kind of image a story may call for and this simple 4-step mindset to photographing your food will save the day.
Still confused? No Prob! I have a video of this tutorial that makes this fun pro tip super simple.
Check Out ALL the VIDEO Tutorials I have on my Course page
And don't forget to grab up this Spicy Lemon And Mint Gemelli With Creamy Ricotta And Grilled Zucchini Recipe Below!!!!
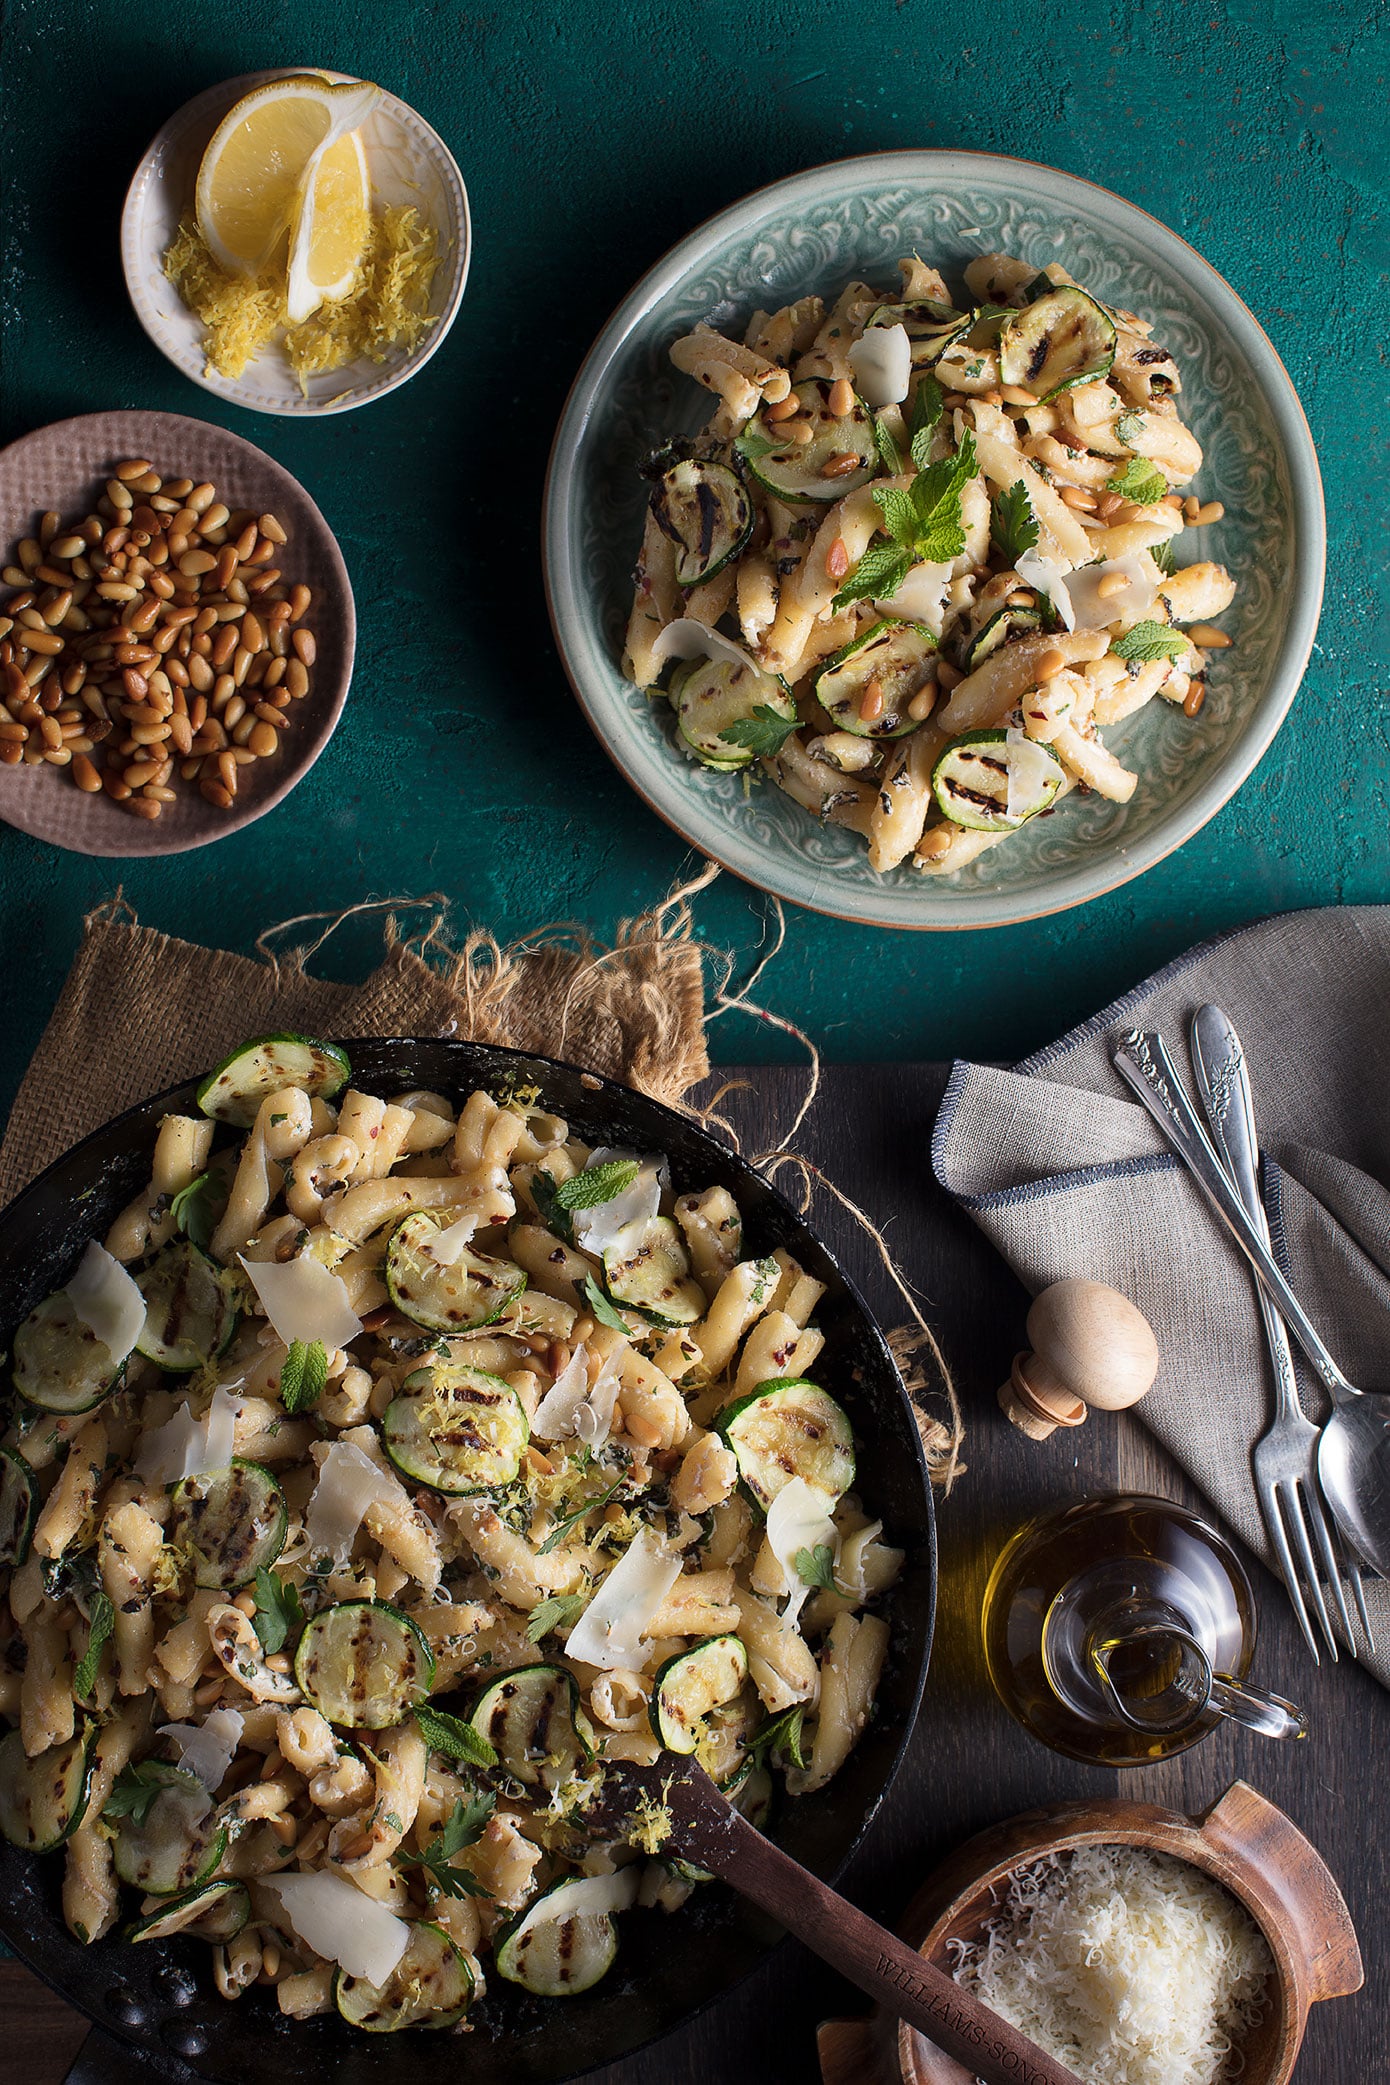
SPICY LEMON AND MINT GEMELLI WITH CREAMY RICOTTA AND GRILLED ZUCCHINI
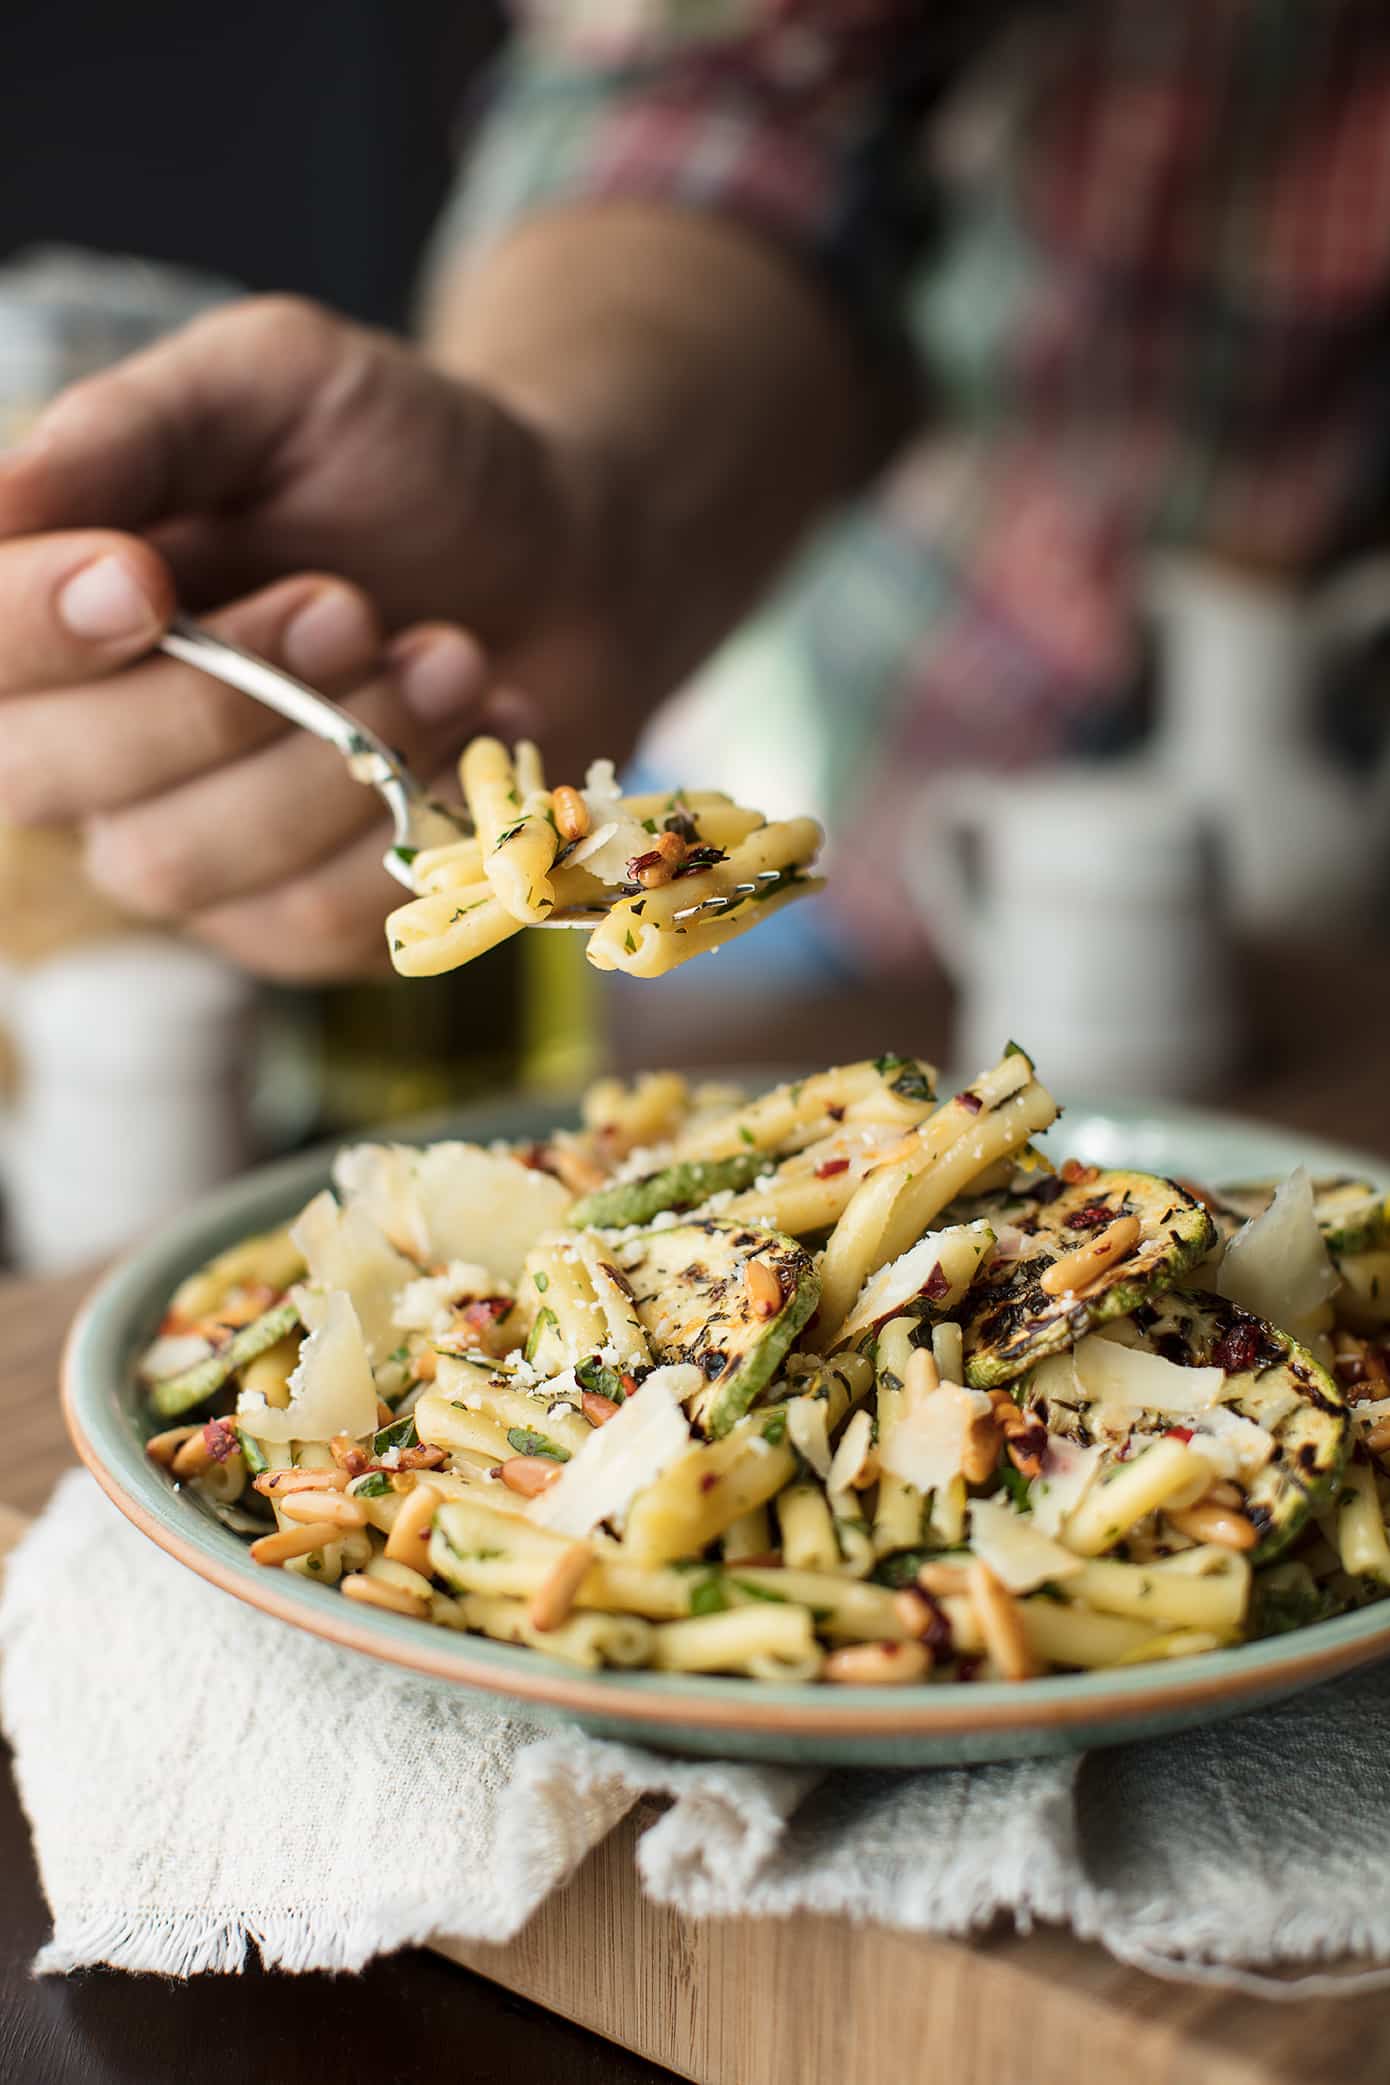
This spicy lemon and mint gemelli with creamy ricotta and grilled zucchini is my back-pocket recipe, I whip out when I'm having those unexpected (aka I forgot) dinner plans. It's a simple recipe with BIG flavor and even without meat it is hearty enough for the most die-hard carnivores. The subtle heat from the pepper flakes, the playful sweetness of fresh lemon and mint, and the richness of the creamy ricotta and thick pasta hits that perfect zone where the Middle East meets the Mediterranean.
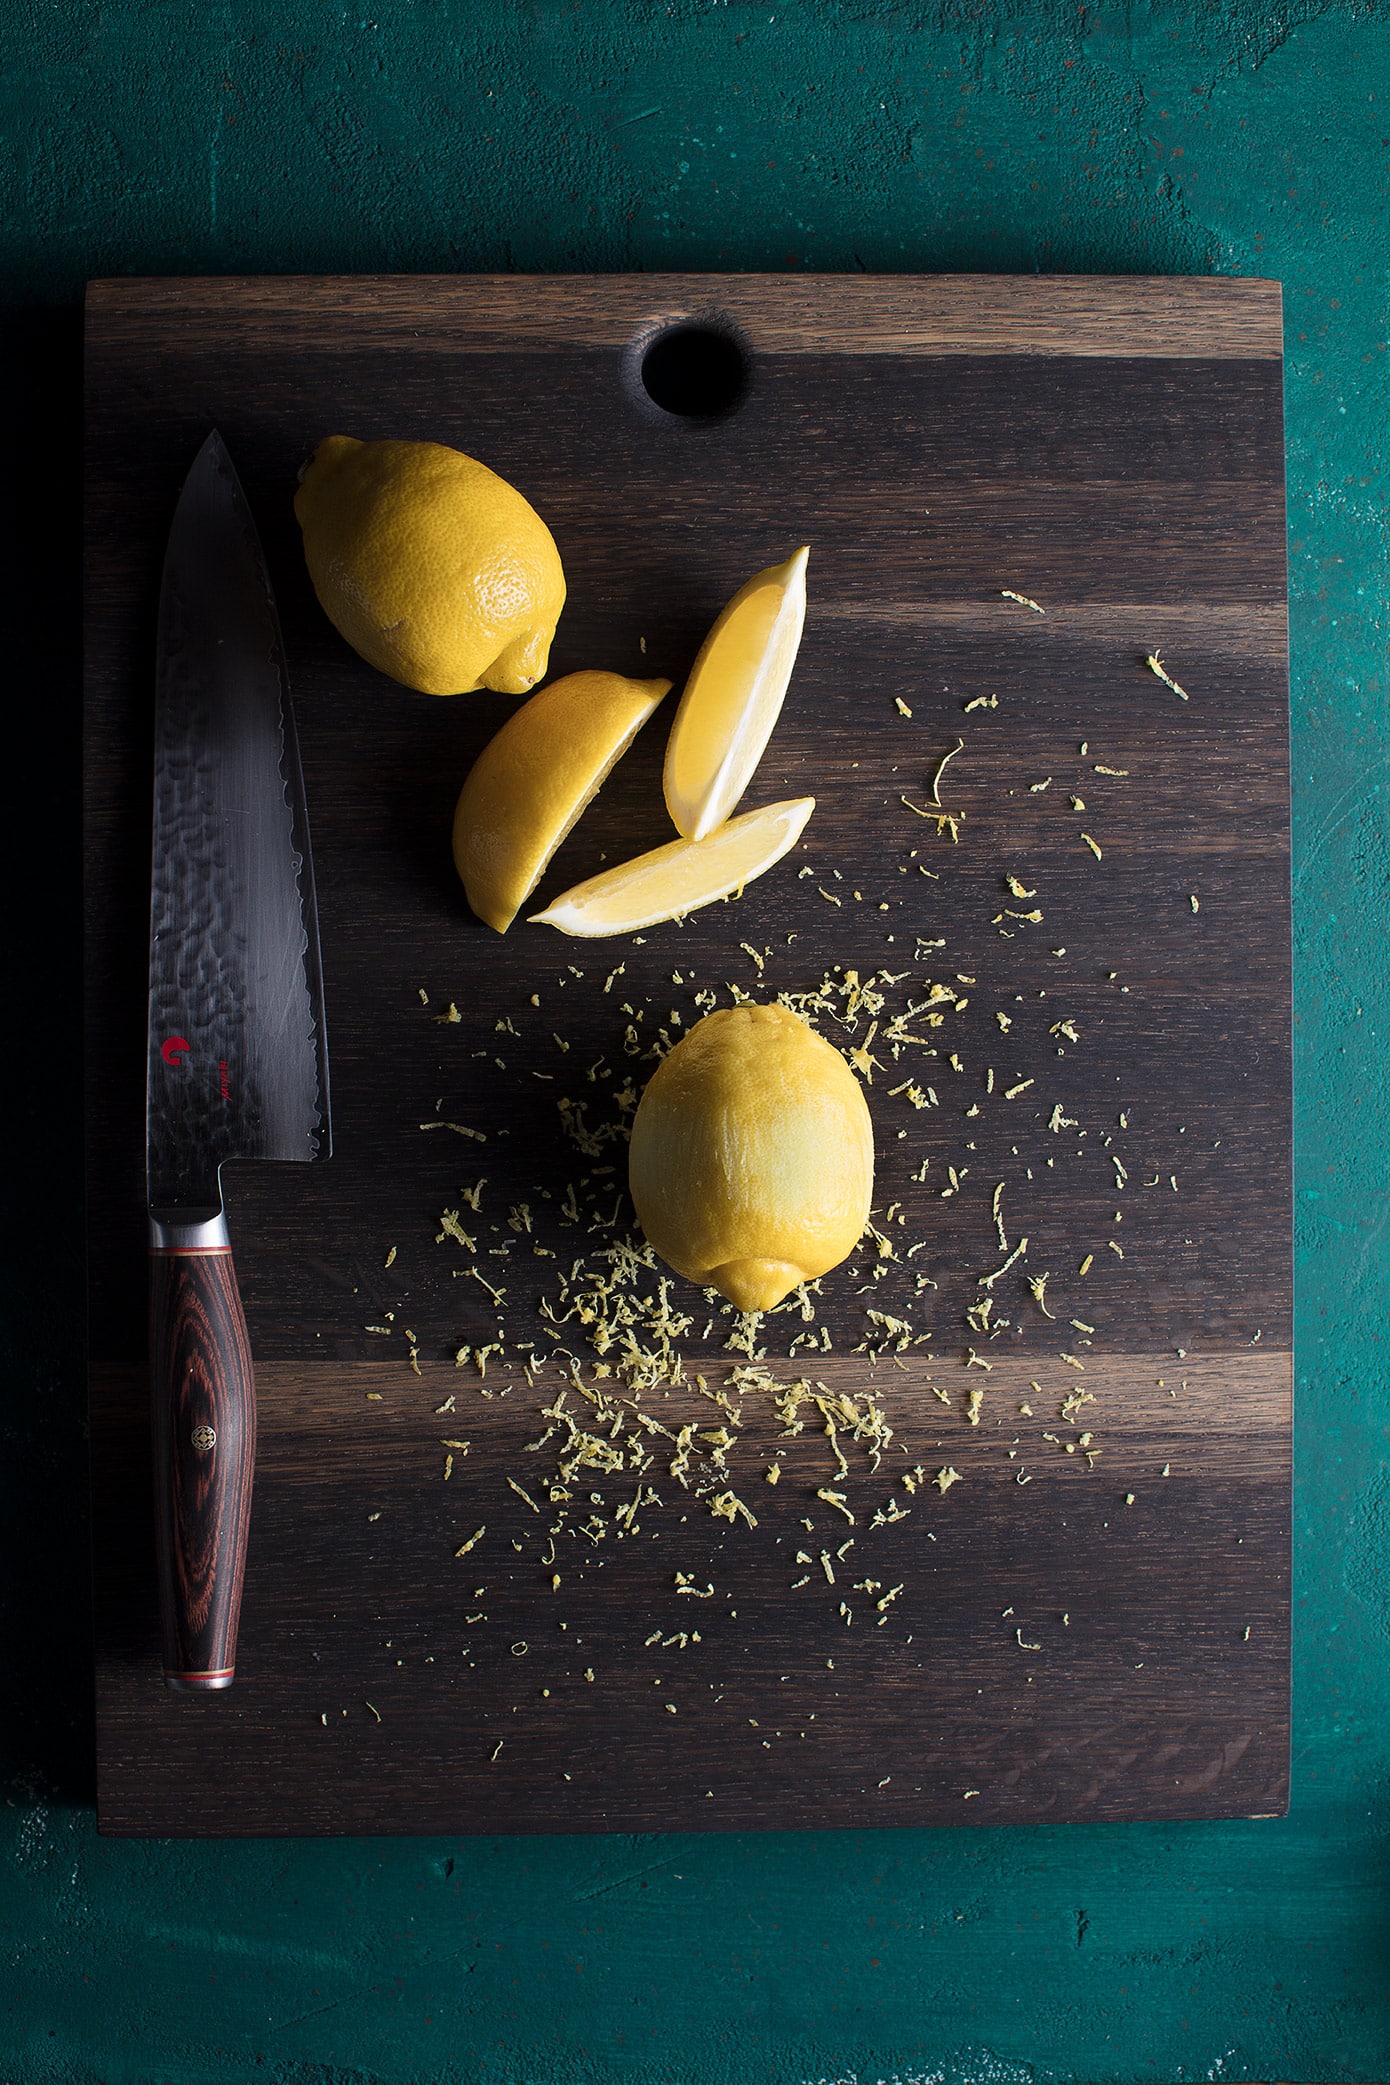
I'm a sucker for lemon zest; really any excuse to put it into a recipe and I'm busting out the zester. However, what really pulls this gemelli recipe together for me is sautéing the pasta at the end. The bath in olive oil, garlic and fragrant chili flakes coats the gemelli and with a few quick turns of the spatula you've negated the need for a typical pasta sauce.
The recipe for this Spicy Lemon & Mint Gemelli with Creamy Ricotta and Grilled Zucchini is below, however while shooting the images for this post I ran into great little pro tip recipe for food photographers that I love and wanted to share with you.
Ps: Check out the video tutorial on how I shot this recipe and more in my Food Photography Masterclass, which is 20% off until the end of March!